Forum Replies Created

Viewing 18 posts - 1 through 18 (of 18 total)
  • Leslie Martin
    Posts: 18
    #1810036

    Hey Aaron,
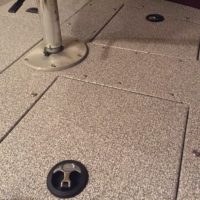
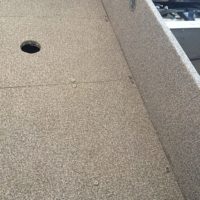
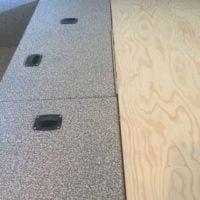
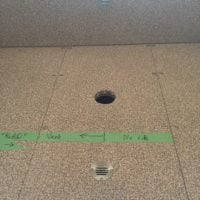
    I love how the vinyl worked out. I did use thicker plywood, and coated them in exterior oil based primer to start. The vinyl is so nice for clean up and it doesn’t get hot to touch in the summer either. I used lepage contact cement for setting all vinyl surfaces. At the early stages i used a weak epoxy spray for a few pieces, but it wasn’t successful. Carpet collects too much junk and i get tons of compliments with how mine looks.

    Leslie Martin
    Posts: 18
    #1795897

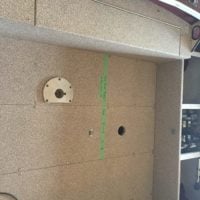
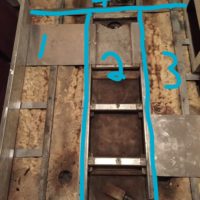
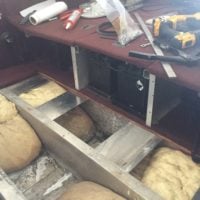
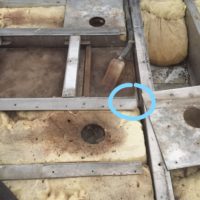
    Water will get in no mater what, from bow splash or whatever. i used an exterior oil based primer on the plywood. In the event that water makes contact with the wood it cant absorb into it. I purposely set up the floor so that i can access the main area floor with out removing the front bow area. had to add a piece of angle to the rib that is under the the rear of the bow area to do it, pictures will show what i did. haha dont get over whelmed. its worth it

    Leslie Martin
    Posts: 18
    #1795873

    Man, that is a complete gut out!!! Yeah i would suggest put something in the middle to prevent any new spray foam from settling in the low part of the bow.Need that open for water getting to the rear drain. Re silicone that low trough in the middle of the hull. And don’t be shy to put good aluminum structure under your individual seats. 3/4 plywood every where. A completely different boat.

    Leslie Martin
    Posts: 18
    #1771545

    im stuck on the rod locker, i need to replace the upright piece (piece that the top comes down on, since i have lifted it. Piece is now longer and taller. Debating between plywood or bending aluminum. The tubes aren’t high on my list, not this year. just trying to close it in. I got that angle off with minimal damage.

    Leslie Martin
    Posts: 18
    #1770111

    Got the front casting deck in yesterday. So glad it is done. The thinking is done lol. Just need to finish the rod locker and smaller detail work.

    Attachments:
    1. IMG_3266.jpg

    2. IMG_3258.jpg

    Leslie Martin
    Posts: 18
    #1769513

    Some more of the front

    Attachments:
    1. IMG_3240.jpg

    2. IMG_3244.jpg

    Leslie Martin
    Posts: 18
    #1769508

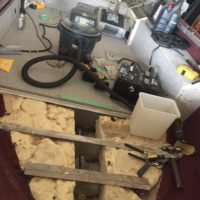
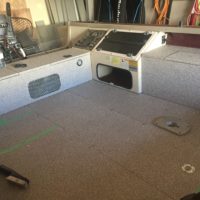
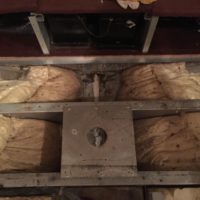
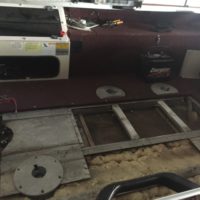
    I know i haven’t posted in a while, but i have definitely had some good progress. I was fighting cold temps in the garage from march thru till now, but it has paid off. I finished the rear compartments and live well and then dropped in my new floor pieces. So happy with how that turned out. After that i was looking at the casting deck and new that i couldn’t leave it. Plus when i was prepping the lower section i had noticed that some of the spray foam that protruded thru the cross member from the bow section was quite damp. I ripped it out and found that the water couldn’t escape from the front. SO i cut out the middle portion of the spray in insulation. Now it has an open path to the rear bilge pump. Replaced the lower floor under the front deck as well. A lot of work but the inside of my boat looks 20 years newer. Just fitting the front hatches, installing my new Perko Latches, and i will be adjusting the rod locker at the end. Will be glad when the last piece goes in

    Attachments:
    1. IMG_3247.jpg

    2. IMG_3243.jpg

    3. IMG_3199.jpg

    4. IMG_3250.jpg

    Leslie Martin
    Posts: 18
    #1758508

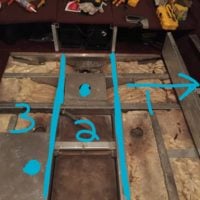
    So currently i was waiting for vinyl to come in, but i realized it is so thin that i might be able to get away with 3/4 under the rear compartment and rod storage area. So that should simplify things. Until that gets in i am kinda up a creek. Yeah the 70 moves it, i wish i had your tiller handle. Mine is much shorter and the tilt is a seperate switch which sucks. But that is next project. I am planning the floor to be three piece from the rear compartment right to the front. I played around with the idea of making the rod storage larger today. Still up for debate. Did you leave that riveted piece on the inside of your rod locker when you made yours taller, or how did you block that up. Still mulling that over

    Attachments:
    1. IMG_3079_LI.jpg

    2. IMG_3073_LI.jpg

    Leslie Martin
    Posts: 18
    #1757326

    mine is quite similar to yours

    Attachments:
    1. IMG_2106.jpg

    2. IMG_2151.jpg

    Leslie Martin
    Posts: 18
    #1757322

    Ok, so i redid the front, i didn’t like it. i attached what i did. Think i am leaving it to two movable seat locations. the location on the right was causing the rail to stick up alot more then it should. When i removed it and walked on it a bit, it settled down a lot.
    I really dig the struts or whatever those shocks are called on that rod locker lid. I really need to organize mine too, don’t like having them just thrown in there. i might raise mine up too. Anyways im really glad i found this forum. Gives me the confidence to push forward. So next step is putting more support under the rod locker to the next joist, and clean up the 1/2 inch under the livewell, rod locker, and rear compartment.

    Attachments:
    1. IMG_3064.jpg

    Leslie Martin
    Posts: 18
    #1756742

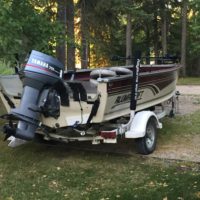
    It in a Magnum 165 powered by a 60 hp 2 stroke Yamaha.

    Leslie Martin
    Posts: 18
    #1756739

    These are my supports up front. But i may upgrade to angle off the lower support

    Attachments:
    1. IMG_3051.jpg

    Leslie Martin
    Posts: 18
    #1756737

    This is my high spot. I think im gonna leave the seat location out and just cut that end down. Keep it simple

    Attachments:
    1. IMG_3054_LI-2.jpg

    Leslie Martin
    Posts: 18
    #1756726

    Hey, I am keeping the three in the front, almost want to make it just the two, the front center and the left one. Ill just install a pedestal for the tiller seat. I have a higher aluminum floor joist by the front right seat location. Its a full 1/4 inch higher then the crosser right beside it. not quite sure if grinding the higher end down is a great idea, but a needless hump wasnt the plan either. Besides that i am getting the supports in at the front. just sliding some .100 aluminum under the forward crosser under the compartments and then riveting to the exposed crosser rib. Ill post pics, the pieces i have put in are better then nothing but not really that durable. I may just put a piece of angle in their to help support thr front, not really loving it. any input on the pic i post would be appreciate it.

    Leslie Martin
    Posts: 18
    #1755046

    Thank you so much for the detail. I am really torn as to how to finish the floor sections. Tank accessibility is my concern but yes, the two piece floor is way better looking. From what i can tell on McMaster Carr, those screws are Zinc coated. I am either going to order the true ones from Alumacraft or go another route thru a local boat builder. I have just picked up the Aluminum Supports for the front, and am about to cut out the front and left side piece. Here goes

    Attachments:
    1. IMG_2995.jpg

    Leslie Martin
    Posts: 18
    #1753668

    Ok that last picture was really helpful, and after reviewing all of your pics, i think you left it half inch under the battery and rear storage as well right? Otherwise that front wall of that compartment would be higher then the rear or am I mistaken?. From what I see that rear wall toward the back is pretty rigid, and so I think I might just make that a seperate piece right across the back compartment, and then go 3/4 for the open part. Think the plan is coming together. And I like that you didn’t continue the floor under the front casting deck like factory. So those two pieces in the main floor,,,,, your not overly concerned about accessing the tank much then? Or are they easy to remove with screws I’m assuming? I am seriously not trying to critique, I am just so glad I’m not alone in doing this. Thanks again

    Leslie Martin
    Posts: 18
    #1752965

    What I mean is, leaving the old floor under the live well and console, and just replacing the exposed portion where you walk, cutting around the left edge of the floor. I might try and slide some thin aluminum thru to the outer support lip under the older plywood that i cant get to, and attempt to prevent and sag along the edge. I am aiming to keep the gas tank accessible like it was from factory. I will post pics later.

    Leslie Martin
    Posts: 18
    #1752533

    I am currently redoing the floor in my 98 alumacraft magnum. I am at the point of removing the live well, to get the rest of the left portion of the floor. My question is, if I just cut around the live well and console, and replaced the portion in the main area to where the seats are located will the floor under the live well sag or did you put some kind of support under the joint since you said you had to keep the original 1/2 inch under the compartments. Any input would be appreciated since you are literally working on the same beast I am. Thanks

Viewing 18 posts - 1 through 18 (of 18 total)