Otter Cabin assembly???

  • tucrs
    NW Metro
    Posts: 999
    #1456096

    So I am so excited to announce that I finally bought a Otter Cabin Ice House. ) FULL THERMAL!!!

    So for the guys who put them together last year any quirks? Anything you would have done differently?
    I will be putting in lights in the house and I am sure other mods too. I have purchased runners as well.

    Thank you all in advance!

    PikeFishman
    St. Paul, MN
    Posts: 364
    #1456115

    Put the runners in first! That’s about alli can offer. My Otter was petty straight forward just too some time, I have the Pro 900 Cabin.

    to_setter
    Stone Lake, WI
    Posts: 591
    #1456170

    When you mount the bar that supports the back of the seats, mount it lower (1/2 inch or so) than recommended or they’ll be tilted pretty badly forward trying to dump you out.

    tucrs
    NW Metro
    Posts: 999
    #1456186

    Thank you all. Good tip.

    jon amundson
    Posts: 143
    #1456321

    I Am Thinking About Riveting The Poles together Instead Of Useing The Self Tapping Screw. I Have Had Three Or Four Come Loose Or Fall out

    Chris Raymond
    Keweenaw Peninsula, MI
    Posts: 514
    #1456345

    Yes, put the hyfax on first before anything else. Here are the rest of my mods:

    1) I’ve secured a board with self-made PVC rod holders against the back wall in order to keep half a dozen rod/reel/bait/lure rigs ready to go.

    2) Added some eyebolts through the back wall so as to attach short ice screw tie outs when I’m hand pulling early and late when it’s windy.

    3) Added both bow and stern plywood transoms to spread loads when towing heavy loads long distances over rugged ice.

    4) Added a rain gutter the length of the sled just behind the front (when seated) lip to store the tent rods when not in use as well as a place to put things off of floor while fishing.

    5) Added LED lighting to two overhead bars as well as on the front side under the front lip (again, when seated) as well as a small well (plywood) for a 12V 18A accessory battery used for LEDs and underwater smelt light.

    Will Roseberg
    Moderator
    Hanover, MN
    Posts: 2121
    #1456355

    I Am Thinking About Riveting The Poles together Instead Of Useing The Self Tapping Screw. I Have Had Three Or Four Come Loose Or Fall out

    Excellent point… Here is the easy fix.

    Step 1 – First off be careful when installing the self tapping screws into the aluminum poles so you don’t end up over tightening and stripping out the screws.

    Step 2 – Even properly installed screws can vibrate loose after miles and miles pulled behind a snowmobile/ATV so I put a few wraps of electrical tape around the pole holding each screw in place before putting the canvas shell on my house. Haven’t had one vibrate loose in two years.

    Will

    CBMN
    North Metro
    Posts: 968
    #1456388

    John,

    Yea, put the hifax on first…

    My little trick was using a smaller drill bit than otter recomended to drill the pilot holes for the hifax runner bolts, just a bit smaller than the diameter of the bolt. Then you can insert the bolt under some tension from the hole being small and put all the nuts on later instead of needing to do one bolt and nut at a time due to the curve in the sled the bolts will not stay in the sled withthe recomended hole size. Not any long tern benifit, just makes your install easier. Feel free to PM me if you want better instructions.

    Steve Thompson
    Sioux Falls, South Dakota
    Posts: 185
    #1456437

    When you mount the bar that supports the back of the seats, mount it lower (1/2 inch or so) than recommended or they’ll be tilted pretty badly forward trying to dump you out.

    I would agree. I think I may have lowered mine about 3/4″ to 1″. Try to figure out a way to hold it in temporarily and make sure the seats tip back slightly before drilling. I installed my per directions and felt like I was falling out. Now I have an extra set of holes in the sled… dang-it!

    Zach Peterson
    Austin, Mn
    Posts: 295
    #1456443

    All great advice given.

    The one thing I would add is have a buddy there to help. It is possible to do it yourself (I did with an XT650 Lodge) but it sure would be nice to have 2 sets of hands at times.

    tucrs
    NW Metro
    Posts: 999
    #1456458

    Thank you for the advice on the seats. That would have been a little hiccup.

    I will have 2 people.

    puddlepounder
    Cove Bay Mille Lacs lake MN
    Posts: 1814
    #1458991

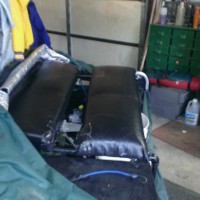
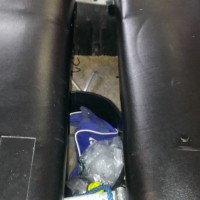
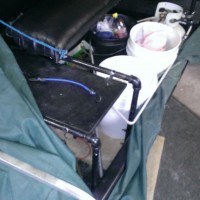
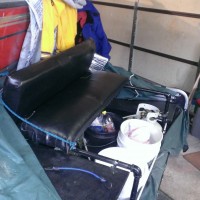
    Junk the stock seats and go custom. The way I set mine up you fish with your feet inside the tub, you don’t loose any room behind you, the heater is farther away from you. 5 gal pails and 20 pound propane fit under the seat and the auger rides on top of the seat. The stock cover will not fit, the fix is a $10 tarp and $6 pack of large bungies. Just like sitting on your couch in your living room. I can send pictures if you like

    jon amundson
    Posts: 143
    #1459249

    Cam You Post Pics I Woild Like To See

    puddlepounder
    Cove Bay Mille Lacs lake MN
    Posts: 1814
    #1459616

    i am having trouble uploading the pics. there must be a setting that is wrong, i will post when i figure it out

    puddlepounder
    Cove Bay Mille Lacs lake MN
    Posts: 1814
    #1459993

    see if this works

    puddlepounder
    Cove Bay Mille Lacs lake MN
    Posts: 1814
    #1459997

    maybe now

    Attachments:
    1. fishhouse-5.jpg

    2. fishhouse-6.jpg

    3. fishhouse.jpg

    4. fishhouse-2.jpg

    bcarlson
    Fargo ND.
    Posts: 16
    #1460776

    I just bought an Otter Lodge. I ran into a problem with the poles being about an Inch to Long. I called up Otter and after some phone tag, I found out that Otter had had a problem with one of their manufactures making the extension poles a little long. It was only on some select models and anyway, I drew the short stick and mine had this problem.

    I had to trim back the 2nd and 3rd pole at the ends where they attach to the sled. Then I slid the encaps back on and marked and redrilled the holes. 5/16ths I think but I would have to look for sure now.

    Anyway if you have a problem with everything just being under too much tension to the point of not being able to extend all the poles, that above mentioned steps was what Otter recommended.

Viewing 18 posts - 1 through 18 (of 18 total)

You must be logged in to reply to this topic.