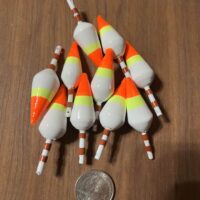
I make these floats. The balsa itself 1-1/4″ high and for the most part 5/8″ at the widest and are used with 1/16-ounce jigs and plastics to 2-1/2″. Some are a bit smaller for use when fishing lighter jigs and smaller plastics. They are about the best float I have ever used.
The secret behind these floats is the instability of the float itself. They lay flat on the water when there’s no weight on them. They can be rigged as static floats or as slips. With the hole in the bottom of the stem and the float top- heavy, any lift or touch on the jig will cause these guys to simply flop over on their sides, which is super for detecting upward hits, much like a spring bobber allows one to see the lift.
They’re compact and when rigged as a slip they set right down on the jig or hook allowing for very decent distance casting. Rigged as a fixed float they cast quite well up to about a 4-foot depth. Bite reaction is the same regardless.
I made these yesterday and did photos of the different steps. We’ll see if I can get them pics to load.
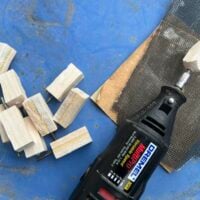
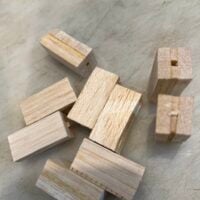
In the picture stack, these floats start out as laminated balsa in the bottom left photo. Using 4 foot lengths of each size to make a 5/8 square stock with a 1/8″ core. The stock is cut to 1-1/2″ lengths as seen in the picture. On one end a 1/8″ square balsa piece, 1/2″ long, is slipped into the core.
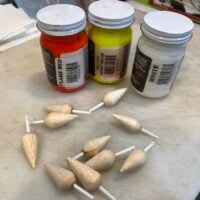
Left center, the picture shows the blanks with arbors inserted into the open end and ready to go into the Dremel for sanding to shape. The first sanding is done with sheetrock sanding sheets and takes maybe a minute to get to the rough dimensions I want, then fine sandpaper is used to do the final shaping. When I switch to the sandpaper, I also use a hacksaw blade to trim the top 1/4 ” off the float body with the Dremel running, then continue with the sandpaper for the final shaping.
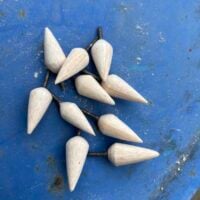
Right center ids the mess of them ready to have the arbors removed. Using more of the 1/8″ square balsa stock cut into 5″ sticks, I insert a stick in each body and each body gets dunked in a bath of very thin dipping lacquer, allowed to drip a few seconds then the stick get stood up in a jar of vermiculite to dry. Each body will get three dips in this lacquer. Since its about a thin as urine on a plate the lacquer dries very quickly, maybe five minutes between dips.
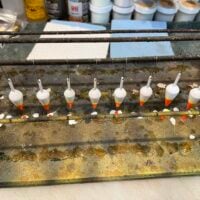
Top right shows the floats after the lacquer bath and with the polystyrene stems glued in place using a lightweight epoxy and ready for the color lacquer dips. I use bent paper clips through the line hole in the stems to hang the dipped floats on a drying rack. The white goes on first, two coats. Then the chartreuse and finally the fluorescent orange. When These coats have dried the floats get 2 coats of a water-born one part epoxy.
The top left shows the floats as they hang to dry hard and the bottom right picture, of course, shows them ready to fish with the silicone line stays slipped up on the lower stems. Rigging is simple. For a static, or fixed, float, remove the silicone sleeves, slide the line thru the eye in the stem, then slide the silicone sleeves back on the line and over the stem as the look in the picture. The top sleeve goes clear to the float body, the second just above the line eye. Rigged as such the float can be adjusted for depth simply by sliding it while holding the line above or below the float with the other hand depending on if you want to raise or lower the float. Just leave the silicone bands in place to run as a slip float. Leaving the bands on the stem does nothing to affect the float or its ability to show up-ward hits and by leaving them there they’ll always be hand if one wants to change from a slip to fixed.
That’s it. The handiest float ever devised and the company that used to make them really messed up by discontinuing them. There are several differences between the old factory-made floats and these, one big difference is the use of the polystyrene stem in these which has a reasonable amount of “give” if they get bounced off of rocks or a dock or hard tree limb. The factory stem was hard plastic and would snap off if it hit something real hard. These floats simply rebound. Als, the line eyes have been chamfered at the top and bottom so that rigged slip the line flows thru the holes without having to run over a sharp edge. The hole in the stem is large enough that line flow is unreal, yet small enough that one can simply leave the thread tags a bit long when trimming a stop and the stop will not go thru the hole.
There are a million variations of floats on the market. Some are gimmick, but for the most part they all work…. just some better than others. I’ve been fishing this particular float for over 30 years and when I couldn’t buy them any longer, I started making my own. The weighted Thills mentioned earlier are great floats for getting distance but then the weight becomes a factor in upward hits. These compact, little floats are sensitive as all get out, and when rigged as a slip they cast easily about 50 feet, maybe longer, on a thin 4 pound line with a 1/16 head and plastic.
Attachments:
486696286_2344490029259777_6169324264042978282_n.jpg
486649657_2344490002593113_8969188966430259024_n.jpg
486610497_2344489969259783_5339035695707191628_n-1.jpg
486186914_2344489942593119_3288533559942447539_n.jpg
487014778_2344489899259790_745396796110705594_n-1.jpg
487418437_2344490075926439_8728006746154127469_n.jpg


