It’s finally done – new MC2 snow camo project

  • kooty
    Keymaster
    1 hour 15 mins to the Pond
    Posts: 18101
    #207717

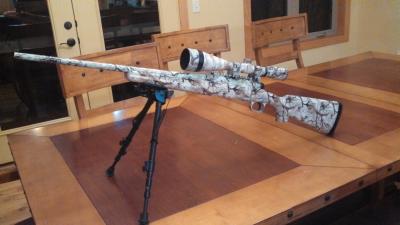
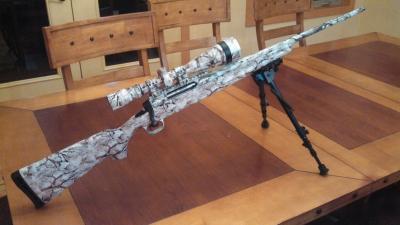
    I plan to do a formal write up on what I’ve learned to this point, however I thought I’d share some pics of my completed project. Now I gotta get it back to the range to dial it in.

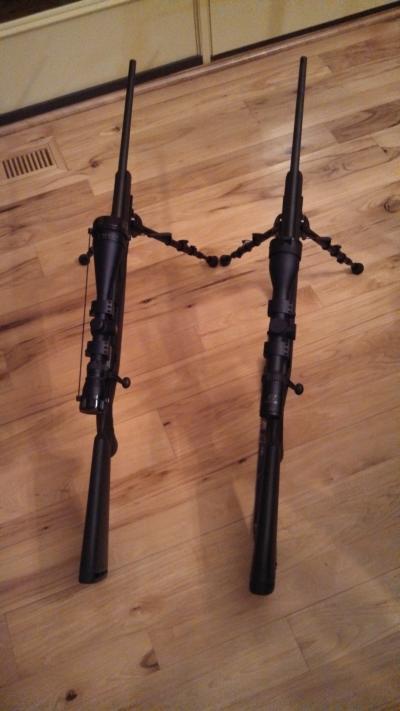
    The Savage Axis in 22-250 is on the left. It has a Simmons Whitetail Classic 6.5-20×50 mounted on top. I wanted to camo this rifle in a snow pattern. I started looking around for a place. They wanted more than I was willing to spend. After watching a few videos on Youtube, I decided I could do this. I ordered up a kit and away I went. I made a bunch of mistakes and had to sand the stock all the way down to the composite once. It’s far from perfect, but it’s “good enough for who it’s for” as of now. We’ll see how well it stands up to the riggers of guns/travel and hunting.
    abster71
    crawford county WI
    Posts: 819
    #129165

    wow sure looks good from here were did you get the material.

    jeff_hansen
    Posts: 475
    #129166

    That turned out awesome… nice job! Is that paint? Or a dip?

    kooty
    Keymaster
    1 hour 15 mins to the Pond
    Posts: 18101
    #129170

    It is a hydro dip. I got the product from http://www.hydraphics.com/catalog/ I got a kit from another place originally. Let’s just say there is a difference in product. Dan at hydraphics has been awesome to work with. The composites require a small amount more effort than most metals or wood. I wasn’t aware of this on my first go. It also makes a huge difference on the base paint you utilize for adhesion.

    I hope to have my write up done by the end of the week along with some video footage of me dipping my shotgun.

    suzuki
    Woodbury, Mn
    Posts: 18715
    #129174

    Looks really nice from here!

    lucas_zemlicka
    Montana
    Posts: 231
    #129182

    Looks like a coyote slayer! Looking forward to seeing the video of you dipping it. Now that you have it figured out I might have to send a few items your way

    life1978
    Eau Claire , WI
    Posts: 2790
    #129195

    Looks good for your firsttime Kooty. I wouldn’t even know from looking they look so good. I’m looking forward to reading or watching how you did this when you post about it.

    farmboy1
    Mantorville, MN
    Posts: 3668
    #129197

    Kooty,

    Would you care to share how much you have in it? I would be interested in doing this. Looks great.

    kooty
    Keymaster
    1 hour 15 mins to the Pond
    Posts: 18101
    #129204

    I’ve probably got around $300.00 into this project at this point. What will $300.00 get you?

    1. I got a $100.00 kit from a place that well, let’s just say the product wasn’t usable. I’ll discuss this in my write up more.
    2. I made a lot of mistakes and burned up a lot of film. I think depending on your artistic ability, one might make fewer. I was simply in too big of a hurry most times.

    Once you have certain items, like activator, you won’t need to purchase any of that for some time. You don’t use much on any one dip.

    I have some time set aside today to work on my “report”. I plan to video the process tomorrow night when I do my shotgun or .22. Assuming my new film shows up. With some editing time, I hope to have it rolled out by the weekend.

    corey_waller
    hastings mn
    Posts: 1525
    #129209

    DANG That looks awesome Kooty. I cant wait to see your video. I have a shotgun that I have been itching to get dipped. this may put me over the edge!!!
    VERY nice work

    corey_waller
    hastings mn
    Posts: 1525
    #129210

    how does it work for getting under edges specifically the rib of a shotgun?

    kooty
    Keymaster
    1 hour 15 mins to the Pond
    Posts: 18101
    #129211

    I’ll be finding out soon. That is one of the biggest challenges I’ve ran into when dipping. Anywhere with gaps can be challenging. In my case, I’ve made sure my base coat of paint covers those areas really well in case the film doesn’t form into those gaps perfectly. It will be less noticeable, in theory… I’ll also tape off half the barrel and only dip one side at a time.

    You can also “touch up” some bad spots, but I’ve not had much luck with this process.

    kooty
    Keymaster
    1 hour 15 mins to the Pond
    Posts: 18101
    #129296

    I had a major malfunction in my spray equipment this past weekend. So the video isn’t done. I will hopefully get the replacement sprayer soon. Then back at it.

    prieser
    Byron, MN
    Posts: 2274
    #129304

    Quote:


    I had a major malfunction in my spray equipment this past weekend. So the video isn’t done. I will hopefully get the replacement sprayer soon. Then back at it.


    You sure do seam to break alot of things that you touch….

    kooty
    Keymaster
    1 hour 15 mins to the Pond
    Posts: 18101
    #129305

    Cripes, why is stuff made so cheap it’s always breaking around me?

    johnee
    Posts: 731
    #129306

    Quote:


    I had a major malfunction in my spray equipment this past weekend. So the video isn’t done.


    As long as you don’t have a wardrobe malfunction it’ll all be good.

    I mean, don’t take this the wrong way, but while we love to see you on video, we just don’t want to see that MUCH of you on video.

    Grouse

    stillakid2
    Roberts, WI
    Posts: 4603
    #129323

    Gun looks good John!

    Steve Plantz
    SE MN
    Posts: 12240
    #129398

    Great job John lookng forward to seeing the video!

Viewing 20 posts - 1 through 20 (of 20 total)

You must be logged in to reply to this topic.