I’ve never been one to let the fact that I’ve never tried something—and therefore probably won’t be any good at it–get it the way of actually trying it. I suppose it was inevitable, the fact that I enjoy both woodworking and hunting/shooting, would see an eventual merger of the two.
It took a while, but last fall I saw the nifty Ruger Charger pistol. For those of you that haven’t seen one, it’s an autoloading pistol based on Ruger’s 10/22 action. The Charger comes standard with a bipod, and so it (unusual for a pistol) it, of course, has a stock that is designed to accommodate the bipod. That gave me the idea that it would be really nice to be able to mount a bipod for use with my Thompson Center Contender pistol when its paired with the .223 barrel.
As some of you may have read elsewhere on this site, I love handgun hunting. In fact, a Thompson Center Contender has been my weapon of choice for the firearms deer season for the past seven years. I also take the Contender out west whenever prairie dogs are on the hit list.
The problem with the Contender is that the factory fore end—and most aftermarket fore ends that I looked at—were too narrow to accept a sling swivel-mounted bipod. Also, of course, was the problem that most replacement stocks are offered as a set with the fore end and the grip.
I started thinking, why not make my own custom fore end and match it to the existing grip so there’s no need to change both? And so it began. I sat down with my design notebook and drew several variations of a stock, all inspired by the Ruger Charger design. After some fiddling and cutting a few test blanks out of pine, I settled on a design and made a set of cardboard templates.
Because I didn’t know if this was actually doable, I didn’t splash out for a high-grade walnut blank. Instead, I scrounged around in my stock room and came up with a decent piece of seasoned American black walnut that looked to be a close color and grain match to the original. The problem was that this stock was only ¾ inch thick and my design called for a finished thickness of just under 1.5 inches. So I cut and glued up a blank .
Cutting the bank to rough shape was the easy part. With 30 minutes at the band saw and the disc sanding machine, I had my rough blank all cut and shaped.
I also cut the channel for the barrel. This was the trickiest part of the power-tool-enabled part of the project. I finally ended up using a ¾ inch router bit on the router table and making five passes to get the depth right. I could write a whole article just on the different ways I tried to solve this problem, but luckily I had made those pine test pieces before, so I used them as cannon fodder to dial in this process.
Now the hard part! The hand shaping work. Bless her soul, but for my birthday a few years back, my lovely wife bought me two beautiful Patternmaker’s rasps, which are the traditional tool used by gun stock makers. For those who aren’t familiar with these, a Patternmaker’s rasp is coarse wood rasp, but the teeth of the rasp are hand cut in a random pattern so that the rasp cuts hardwood very quickly, but does not leave “tracks” in the wood.
After an hour spent with dividers and French curve laying out the contours, I went to work with the rasps. Over a series of evenings, I slowly worked at the shape. I can’t say I did it all by eye, I used the layout lines and a contour tool, but all the shaping was done by hand.
Now we got to the tricky part. The Contender is a break action pistol, so the stock needs a recess so the receiver and trigger guard can move freely as the barrel swings down into the open position. This recess all had to be cut by hand using a dovetail saw and bench chisels. I would say that easily half the total time of the project was spent in chisel work to make this recess. This hand fitting work was an aspect that I hadn’t considered, I thought the hard part would be the contours and shaping, but that was the easiest and most enjoyable aspect of the whole project.
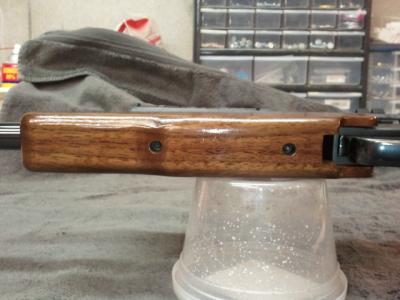
Finally, it was time to sand the project and drill the holes for the two mounting screws. Again, this was another part of the project that was deceptively complicated because the screws needed to be both recessed and stepped on both the top and bottom to align with the mounting lugs on the bottom of the barrel. Just drilling two holes took two evening sessions because each hole is actually a step within a step within a step, so at this point it was definitely a case of measure 12 times and drill once! One wrong move and it was all over.
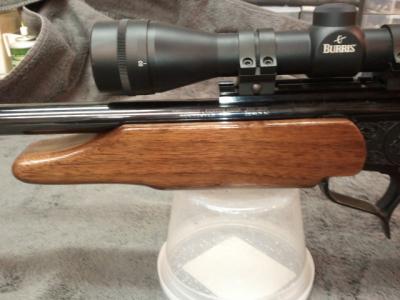
Then it was time for finishing. I tried six different stains and poly combinations to get what I thought was a match, but all this testing was on a test piece of walnut. What would happen with the real stock? What I’m most surprised about was how close I managed to match the color and grain between the new fore end and the existing grip.
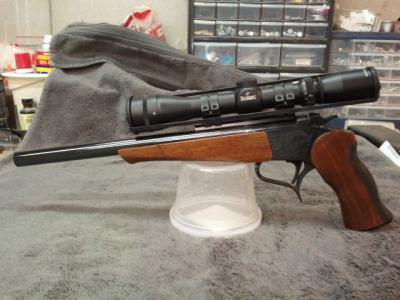
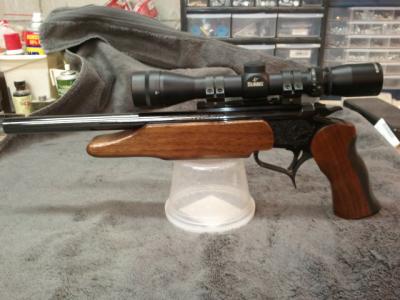
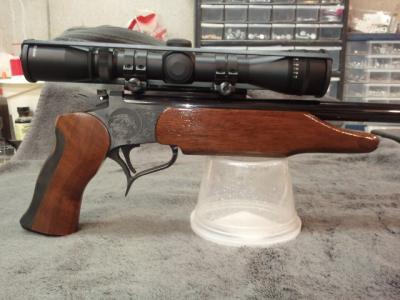
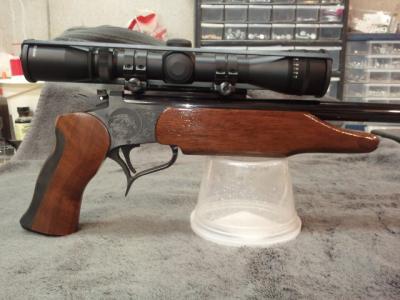
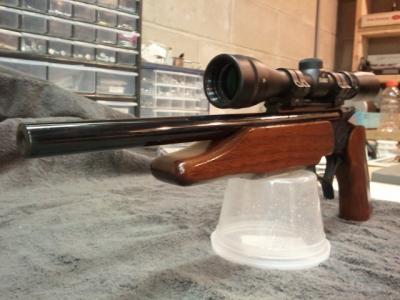
How did it finally turn out? Have a look for yourself.
1. The first picture is the “before” picture of my Contender with the original fore end.
2. New! And now the new fore end.
3. From the other side.
4. Another view of the other side.
5. Closeup.
6. As you can see from the under-side picture, the recess where the trigger gaurd and reciever must pass when the gun is broken was a tricky bit of hand carving. The mounting bolts are deceptively simple looking, but each “hole” took 3 bits and 30 minutes to make.
7. view from the front. I still need to add the sling stud to attach the bipod. Notice that you can’t tell the stock blank is actually two pieces of wood.
It was a great experience and I’m surprised by the results I managed given my total lack of experience.
Grouse
