Like usual you have a well thought out reason for what you do Ricco  , thank you for the reply.
June 2, 2013 at 2:43 pm
#130630
IDO » Forums » Hunting Forums » Deer Hunting » Tip of the Week
Like usual you have a well thought out reason for what you do Ricco  , thank you for the reply.
Tip 17: Place or Check Cameras and Replenish Mineral Sites
With the Spring Turkey season behind us and “hopefully” all of your spring food plot work done, we actually have time to start focusing our efforts on locating a Mature Buck.
If you’re just putting cameras out for the 1st time this year or going to check on some that were already placed, remember to replenish mineral sites, bring extra batteries, memory cards, and even extra cameras (just in case). It’s better to have extra supplies then not enough.
I typically only check cameras every 2-3 wks during June & July. I’m not saying that you shouldn’t or can’t check them more often; I’m just writing what works for me.
*From this point until the end of July, all effort should be on locating a Mature Buck.
The tip this week sounds simple but can be very difficult. Since each year brings new challenges and every buck has different habits, it can and will take a lot of leg work to get a shooter on camera and figure out his travel patterns. The earlier we locate a Mature buck and understand his tendencies, the better our odds become for BBD the 1st week of archery season.
If you haven’t done the above already, get your mineral down and cameras set-up ASAP. It’s crucial to find a “Shooter” before season in order to generate confidence in stand locations and hunting decisions once the season starts.
Tip: 18 Stay out of the woods for 2-3 weeks minimum
The urge to get out and check cameras, food plots, and treestand locations can get overwhelming at times. It can be very difficult to stay away from the woods for long stretches of time. Over the years, I have figured out a way to battle these urges by having a set rotation for cameras, mineral sites, and overall checking things out during the month of June and July.
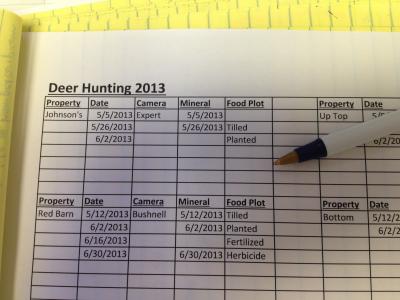
First, make a list of properties on an Excel Spreadsheet. Then, create columns with some of the following; camera locations, mineral locations, date, etc. Make sure to document each time you check or do something for each location. This will help remind you how long it’s been since your last check.
Next, spread out the spots/properties by a few days or a week. Don’t check all the locations on the same day (if possible). Try to check 1-2 properties one week and do the same for 1-2 different properties the next week and then again for 1-2 different properties the following week. By spreading things out, we get the opportunity or excuse (whatever you want to call it) to get out and check on deer movement and activities every week and don’t have to wait a full 2-3 weeks.
A couple more things to think about;
1.Print off a copy of your spread sheet and keep it in your car or truck. This will help when you don’t have access to your computer and need to document what you did.
2.Try to check cameras or place stands right before, during, or after a rain shower. The idea is to keep scent to a minimum and a nice rain is a great way to wash away or minimize scent. I still owe Walleyefisher87 “BIG TIME” for watching my little guy last year while I put my stand up right after it rained. I ended up shooting “Tank” out of that stand.
So, the key with this tip is to stay out of the woods as much as possible and have an organized routine or schedule for checking cameras and mineral sites during June and July. Just because its summer doesn’t mean we can get sloppy with scent control. Pretty soon it’s going to be the end of July and we will need to place stands or consider stand locations and we can’t afford to educate deer in the area.
*The pictures are an example of how to keep things organized on a Spread Sheet

Tip: 19 Bow Tune-up
Unless you bought a brand new bow this year, the following questions need to be addressed every year.
1. When is the last time you had a tune-up done to your bow?
2. How long has it been since you replaced the string on your bow?
3. How long has it been since you have taken the time to Paper Tune your bow?
Strings for example should be replaced every 2-4 yrs with normal use. However, strings could be replaced every year for someone who shoots competitively or could be pushed off for 4-5 yrs for someone with minimal use.
I recall a situation from 7-8 yrs ago where I hung my bow on a stand when climbing up because I didn’t have a string to pull my bow up after I was situated. I ended up “nicking” my cam on something from the stand and that little “nick” cut my string a little every time I would draw my bow. At first I didn’t think much of it but after a while I could see the string was slowly getting worse and I ended up replacing the cam and string on my bow. I’m glad I was paying attention because it wasn’t noticeable unless I was at full draw and it easily could’ve resulted in the string giving way and potentially breaking a limb on my bow or even worse causing injury to me. Ultimately, strings are the same as everything else. You need to inspect your string every time you use your bow.
Once your bow components (rest, sight, & stabilizer) are in order with the existing or new string, you will need to paper tune your bow. Paper –tuning your bow is a must for making your arrows fly straight and consistent. Taking the time to paper-tune your bow will also result in better arrow grouping at all distances. I highly recommend paper-tuning your bow before season every year and even during season if you drop or bump your bow in a way that it throws off your sight.
Also, remember when you sight your bow to follow your arrow. When I first started bow hunting, I couldn’t remember this advice to save my life when sighting my bow.
Even though I only addressed a couple of tune-up questions, there are several other variables to consider when paying for a tune-up or doing a tune-up on your own. Make sure you have a new string or one that is in good condition, paper-tune your bow or have an archery shop do it for you, and check all other bow components to verify good working condition. With bow opener under 3 months away in a lot of states, it’s time to get some of these “little things” out of the way.
*The picture below shows what an arrows flight should look like when properly paper-tuned. Notice that the arrow shaft is centered and all 3 fletchings are evenly proportioned.
ahh Picco your gonna make me blush….great tips as usual….and the season is getting closer day by day
Tip: 20 Shooting lanes & Treestand Safety
There’s been a lot of hard work invested during the past month or 2 in order to prep for this upcoming deer season. Even though spring turkey hunting is over, open water fishing is in full swing, and things are starting to shape up with spring food plots. We need to start tweaking our existing treestand locations and consider some new locations.
We all have our “go to” treestand locations. I can visualize a couple of mine right now. Each perfectly situated 18’ feet up off the forest floor, strategically placed where the tree splits to help conceal my silhouette and topped off with a nice size limb about 1.5’ feet above my head with a bow hanger twisted in. Does it get any better than sitting in your favorite stand and waiting for a deer to walk by? Absolutely not!
Shooting Lanes:
Need to be cleared out from previous years. I understand that some of the treestands have been in the same tree for a long time but, things change in the woods as most of you know. A few examples of things that can change in the woods are; trees dying, selective harvest by the property owner, animals taking residence by your stand, or high wind storms (which I fell victim to). I still remember going out to check on my #1 stand after a big storm with high straight line winds to find that a tree next to where my stand was blew over and slammed my tree stand, breaking the seat post from the base. It was in the middle of August 09’ and season was only 1 month away. The major thing that sucked about what happened was; this particular stand produced 2 bucks in 2 years and I couldn’t replace the “spot on the spot”. To add a little salt to the wound, on Oct. 16th that year I was blessed to watch a nice 140” buck walk by the location and I was stuck 20-25 yards out of range to get a good shot. It would’ve been 3 yrs in a row if it hadn’t been for the high wind storm and I didn’t have to move to a different tree. I ended up having the best year of my hunting career for Mature Deer sightings but wasn’t able to harvest and eventually ate Tag Soup. (The broken/split treestand still sits in the tree to this day)
Checking Stands:
Another thing to look at when clearing out shooting lanes is the straps and chains on your treestands themselves. Most treestand manufacturers only have a 1 year manufacturer’s warranty. This is for a couple of reasons but basically, the testing and research has proven that the straps and stand should hold up for a period of 12 months. Each year I highly recommend checking all straps and replacing if necessary. Here’s a couple of Treestand Manufacturer’s websites that go over questions and tune-up’s;
http://www.biggametreestands.com/treestand-safety-faq.html
http://www.lonewolfhuntingproducts.com/publisher/blog/2011/7/11/pre-season-tree-stand-tune-up-time
Late June and early July is a great time to clear shooting lanes in your traditional hunting spots. During the next few weeks, the leaves on trees and underbrush will be at their fullest all year. Remember to be safe and double check all the straps, chains, and components before sitting in or setting-up your treestand. Even if you think you don’t need to take this step, it’s still a good idea to place a stand and verify or check that there isn’t any new growth. Things may have changed in your area since last fall and you don’t want to walk up to your tree on opening day to find out that it’s not huntable.
*As for new treestand locations? Since we likely haven’t established any Mature Buck habits to this point, I will hold off until mid to late August before addressing.
Tip: 21 Prep work and planting fall food plots
In many ways the 4th of July is bitter sweet. On one side of the fence we just spent quality time with family and friends creating new memories. Hopefully everyone had an opportunity to grill out, relax at the lake, watch some fireworks, catch some fish, or tip back a few beverages. On the other side, we’re almost half-way through summer and the days are getting shorter. Before we know it, the temperature at night is going to drop and summer will fade into early fall. It’s like Mother Nature knows our thoughts. She slowly takes a few minutes of daylight each day and increases our sense of urgency for last minute prep time for this upcoming hunting season. It’s a constant reminder that once the beginning of August rolls around all prep work and aspects of deer season should be addressed.
Ideally, you are seeing positive results for your efforts in planting food plots this spring. If not, don’t worry as there is still time to make up for poor results. Keep in mind that there is only 2-3 week window to make adjustments. Prep work for planting fall food plots is similar for planting spring food plots. You will need to go through the same process of killing weeds and prepping the soil/seed bed as you would in spring. Really, the biggest difference is the varieties of seed/plants available and depth at which to plant.
So, if you haven’t had the time or think that you have run out of time, don’t get rattled. Right now is when all the prepping, effort, and hard work will pay off come deer opener. Make sure to set aside the time to finish the remaining few odds and ends. I suggest making a list and prioritizing what is most important or time consuming. Between hanging stands, cutting shooting lanes, checking on mineral, checking cameras, and planting fall food plots, there is definitely something to address. Getting these final touches taken care of will bring a sense of accomplishment and peace of mind. After all, sitting in a tree and waiting for a deer to walk by is the easy part.
Tip: 22 Plant fall food plots the 2nd or 3rd week in July
The dog days of summer have finally arrived and the 10 day forecast isn’t calling for rain. What to do? Do you wait for rain or plant without rain in the forecast? I’m pretty sure a lot of us are faced with this decision year in and year out. Since, most of us have to report to work every day and have limited free time on weekends; it can be difficult to align our schedules to coordinate with the weather. So, do you plant or not? That is the question.
I recall waiting until Aug 12, 2012 before planting my fall plot last year and the results were almost non-existent. I highly recommend planting in late July (rain or no rain) and start praying for a thunderstorm or 2. If you wait too long, it might not even pay to plant anything since the amount of time left during the growing season will not be long enough to support good growth.
Remember, we need to check off as many hunting chores as possible on our “to do list” before the beginning of August. We with only a couple weekends left in July, decisions or projects need to be finalized. Do not second guess yourself and stick with your decisions. It’s easy to get caught up in the “what if’s”. If I could tell a new or veteran bow hunter any advice about chasing Mature Bucks it’s to believe in your decisions before, during, and after each hunt. Hunting is more of a mental game than anything and having confidence when trying to seal the deal on a wallhanger is imperative.
Don’t forget, we will need all the time we can to start patterning a buck or 2 and the less we disrupt the deer woods during the final 30 days leading up to opener the better. It’s almost go time.
Tip23: Cut licking branches to minimize scrapes
This is a very simple technique that can produce deadly results. Close your eyes for a minute and visualize a mature buck hitting a scrape on your hunting property. If you are like me, you are probably associating this visualization with a video or pic from one of your trail cameras. I’m guessing the visualization is a community scrape that gets hit by most bucks in the area year after year.
Now close your eyes again and visualize the secondary scrapes on the property. Is the visual the same or different? Do you see the same bucks working these scrapes? The question that comes to mind; Do the secondary scrape licking branches really need to be there?
I’m not claiming to be an expert scrape hunter but if there is one thing I do know about hunting scrapes, eliminating licking branches that a buck can make a scrape will help narrow down his options to where he can. Having pre-determined areas for scrape locations on your property will work to your advantage in the later stages of the Pre-rut activity.
This technique begins by walking around the property with a small hand saw or snips to cut “competing” licking branches that may put a deer out of position in comparison to current stand location. I try to consider all aspects of the hunt; food & water sources, prevailing winds, bedding areas, and sunlight. I definitely do not want to go overboard with cutting branches and recommend leaving the community scrape branches alone. Nothing can replace the natural smells or Mother Nature when it comes to scrape hunting.
This tip works particularly well on field edges and food plot edges. I typically eliminate all but 2 or 3 locations on a field edge and make sure the spot where a buck can scrape is within bow range. I will not hunt the stand unless the wind is perfect. Hunting scrapes can be tricky and if your scent is blowing over the scrape you’re hunting, you might as well go home and watch TV.
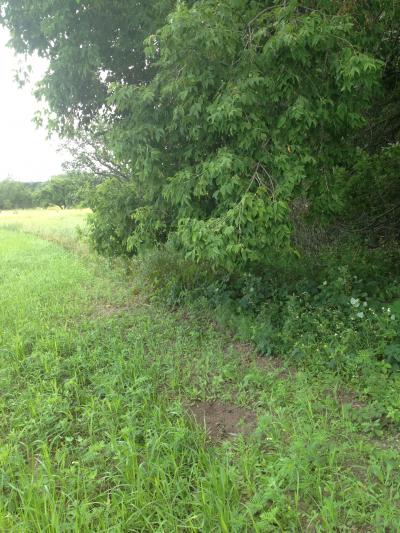
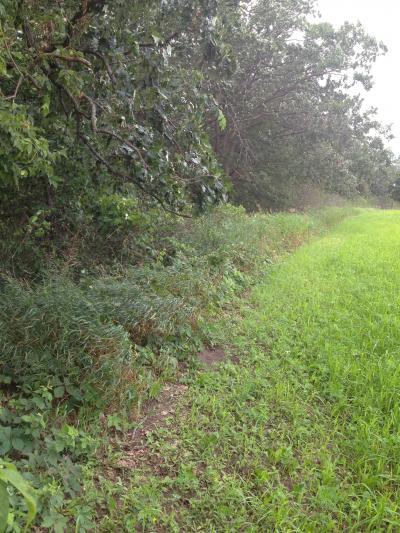
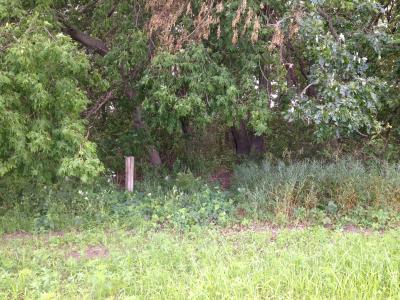
I included a few pictures from one of my plots and it shows a manufactured deer trail between 2 scrapes. The trail was made with a DR Field & Brush Mower and cuts through the woods to CRP on the other side. I strategically positioned an old landscape post for placing camera’s to monitor the scrapes and food plot. I have 2 stands set up for this location. Both are in transition areas and 150-200 yards away in each direction. The stands can be hunted with a South or North wind and are very easy to get in and out of undetected.
*Notice there isn’t another spot along the field edge for a buck to make a scrape
The key with this tip is to visualize deer movement and to minimize licking branches for scraping activity. Don’t fight Mother Nature when utilizing this tip. Use existing or community scrape areas to your advantage. The idea is to cut down the licking branches that compete against the scrapes you’re going to hunt. Remember to take all aspects of the hunt into perspective before cutting anything and give it a try. Cutting branches should be done before season and usually pays off during the last 10 days of Oct.
Tip24: Glass, Glass, Glass, and Glass some more
July 30, 2013: 1st confirmed sighting of a Mature Buck
There is something special about the 1st week of August when it comes to glassing for a Mature Buck. The Boys of Summer have been packing on the inches and their velvet racks have pretty much peaked in the growth department. In most cases, bucks are hanging out in Bachelor groups and are starting to show off the newly developed crowns on their head to the rest of the world. It’s during this last stretch of summer that bucks will start to become more predictable and (in a way) help hunters establish an early season game plan for BBD.
In the deer world, August 1st has really become the beginning of the season for me. All the prep work done earlier in the year is starting to pay off and I’m able to dedicate most of my efforts on locating and patterning a good buck from now until season starts.
I typically start by glassing from my truck 2-4 evenings each week. My goal is to cover as much ground as I can during the final 30-60 minutes of daylight in hopes of getting a glimpse of a Shooter in an area I have permission to hunt. Glassing routes are based on a few factors; 1.) Properties I have permission to hunt. 2.) Fields that allow for good viewing such as bean, alfalfa, or CRP. 3.) Close proximity to where I live. Throughout the years, I’ve noticed that deer (especially mature bucks) prefer fields that have some type of cover or bedding area next to them. It also seems that year after year certain fields are just better than others.
One major component that needs to be mentioned with the “glassing approach”, remain level headed after locating a good buck. Remember, just because you have seen a good buck doesn’t mean that a camera needs to be set-up the next chance you get. The last thing you want to do is bump the buck without seeing him again. I personally will hold off with setting a camera up for a specific buck until I can confirm he is staying in the area. In fact, it may take a couple of weeks to see him again after glassing him for the first time. Don’t get bothered by this, it’s normal. If you stay persistent and continue to glass, you should be able to find out where most of the deer are hanging out in the area. Plus, we need to confirm the 1st sighting wasn’t a fluke. This is where I have grown as a hunter over the years. Basically, stay out and do not move in on his core or feeding areas. It’s essential to get at least 1 or 2 more visuals before considering camera set-up locations. And don’t even think about tree stand locations, its way too early for that.
After getting a few confirmed sightings the process will transition from glassing to camera set-up. All thoughts need to come down to one question; “Where can I kill this deer during legal shooting times without bumping him from the area?” Our focus should be on all aspects of this bucks habits and what puts him in a vulnerable position.
Glassing is a lost technique in the ever changing deer hunting technology world but is the one piece of the puzzle that needs to be mastered in order to consistently have a shot at a mature buck. More hunters are using scouting cameras than ever before and getting pictures of a nice buck or 2 is the norm. Although cameras are a great tool for scouting, it has made a lot of deer hunters lazy when it comes to putting in some leg work. I challenge everyone to take your hunting to the next level and get back to your roots. After all, cameras can only cover so much. Now, get out and glass!
*BTW – I saw him again last night and he looked even better
Tip: 25 Camera Set-up Strategies
Placing several cameras on one piece of property is a lot like playing a game of Chess. In Chess, a player will make a series of moves using designated “pieces of the game” with one goal in mind; to trap the opponents King and call out “Checkmate.” I like to look at hunting as a game of Chess. Each piece of hunting equipment has a specific purpose to get a mature buck into a vulnerable position. Game cameras are like the “Rooks” of the deer hunting world. We can put out several cameras at a time to gather information and in return, we are able to concentrate our efforts on the best locations.
It happened, a big buck finally showed his face. Either it was on camera or he was spotted while glassing a field at last light. The best part, it happens to be the one buck that you wanted to make it from last year. He’s a 4.5 yr old and has a perfect main frame 10 pt rack with a couple of stickers off the base. For most of us, this can only mean one thing; Time to get obsessed.
I know first-hand how hard it can be to hold back the excitement and anxiety when confirming a good buck made if from the previous year. Almost instantly, thoughts and questions come to mind. Which buck is it? How old is he? What will he score? Where does he bed? Where does he eat? Where does he drink? And so on. These thoughts and questions (that need to get answered) about the buck can get over-whelming at times. I will even visualize the hunting situation that will put him down and see myself holding onto the 150-160” bone on top of his head. This type of thought process is nothing new when confirming a big buck is in the area and one that will repeat itself year after year in anticipation to the upcoming deer season. Before I even realize it, all of my thoughts get consumed by the buck.
Hopefully the above paragraph describes a real life situation that most (if not all) of us face on a yearly basis. Now comes the big question; How do I put myself in a position to get a shot at this buck? The answer: Use game cameras to locate the bucks transition zones.
Over the past few years, I have relied heavily on game cameras to locate “transition areas”. I’ll be the first to admit that I love watching video clips of a buck on a field edge working over a scrape. If not video, I love looking at still pictures of mature bucks over a scrape to. Whatever it is about a mature buck and game cameras, I love it! However, one major thing that I have learned over the past 10 years with game cameras is; game cameras are an absolute must in order to find the best location to get a shot at a mature buck. This process didn’t happen overnight and is really still a work in progress.
*Transition areas: A preferred travel route used by deer between bedding, food, and/or water
Something happened in 2007 that made me change the way I use my cameras. I had a buck making scrapes and rubbing some big trees on a point of woods but couldn’t get a picture of him. This went on for 4-5 weeks and I was getting very frustrated. It seemed that every time I went to check the camera, there was more sign but I wasn’t getting any pictures of the buck that was making the sign. I was only using 2 cameras at the time and designated them to 1 property each. So, out of frustration, I positioned the camera on the opposite side of the tree to face the other way. I didn’t know what else to do? A week goes by and I check the camera again. I couldn’t believe my eyes. I was rewarded with a picture of the buck on the first night. Here, he wasn’t using the main trail at all. Instead he was walking right in the middle of the CRP field. Why didn’t I think of that before? I blame it on reading too much North American Whitetail and needing to do everything by the book (according to experts). And for the record, I shot the buck the 1st night that I set-up on him. I’ll admit luck had a lot to do with it.
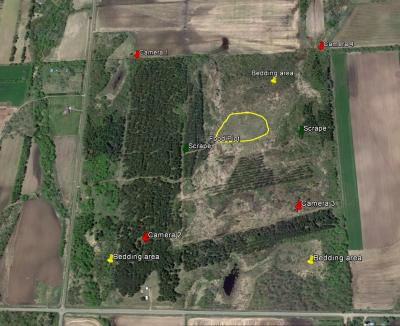
Honestly, it took me a while to get away from setting up cameras on scrapes and main trails. Now, my first concern (above all else) is locating a mature buck. Once I can confirm that a big buck is around, I will formulate a plan or strategy to finding his transition area. I have included a picture that shows the following;
1.) Food plot – yellow circle
2.) Scrapes – brown pins
3.) Bedding Areas – yellow pins
4.) Camera Locations – red pins
At the moment, I know there is a 3.5 yr old 125-130” (8) pt on this property. It’s based on a confirmed sighting and pictures of him on the food plot. The first thing I did after getting his picture, I took the camera off the food plot and grabbed a few cameras from other properties that I do not have any big bucks on at the moment. I strategically placed (4) cameras on trails by bedding areas or trails on the property lines. As you can see in the picture, I have basically covered the corners of the property. I did this for a few reasons but the biggest is to see if he is leaving or staying on the property.
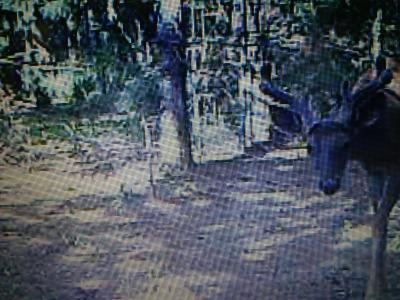
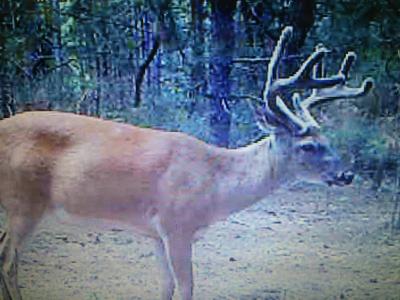
The 1st picture I have of him was from June 28th and the last picture I have of him is from August 1st. In June, I wasn’t sure how big he was going to get or which buck he was. Now that I’ve had my cameras set-up on this property for the past month, I have several pictures of him; I can identify which buck he is from last year, I found out where he is bedding and which location he is killable. I personally will not be going after this buck but gave a buddy of mine the “green light” if he wants to.
*Notice the pictures are during the day
As you can see, I didn’t do anything special to locate this buck. I just put in a little bit of extra effort and time to place additional cameras on field edges, pinch points, or obvious exit and entry trails in order to figure out a pattern. It just so happens that this buck likes to bed by camera 2 and knowing this ahead of time, I can hunt this spot with an N/NW wind very easily. Plus, my access to and from the stand location from where I park is only 200 yards. Talk about a perfect scenario.
To sum things up, I recommend having a strategy in place when setting up game cameras on your hunting property. This will give you a huge advantage when it comes to figuring out a bucks pattern. Putting out several cameras on one piece of property will definitely involve more effort and time but the rewards can be worth it. Sometimes slight changes can open up a new possibility or opportunity. Little things like placing a camera to face the opposite direction on the same tree could lead you to a spot that you never even thought about hunting. The main thing is to stay persistent in your efforts when trying to pattern a buck. The goal is to eliminate areas and concentrate efforts on the prime spots that give us the best opportunity to get a shot. So, focus on 1 or 2 deer and narrow things down. From now until opener, we must focus on finding transition areas. Don’t forget, saying; “Checkmate” is always more fun compared to when your opponent says it to you.
Tip 26: Treestand Placement
Picking the right location to place a treestand can be one of the biggest challenges we face as deer hunters. In fact, I have to take a statement from an all-time classic deer hunting video called “Bowhunting October Whitetails” to get my point across. During the video, Rick Blase narrates on treestand placement and says something like this; “It’s better to pick a not so perfect tree in the right spot then to pick the perfect tree in the wrong spot.” Of course, there are exceptions to the statement above but for the most part, especially when bowhunting, you must place your treestand in the best location, not necessarily the best tree.
My interpretation from the above statement means a couple of things. One, you might have to place a stand in a less than ideal tree to hunt out of. Two, you shouldn’t place your treestand in a location that will take you out of the “kill zone” for the deer you are after.
Since, a lot of us have been working our butts off since spring in hopes of killing a mature buck this fall, why leave your encounter with a “shooter” to chance. Placing your treestand in the correct location is what ultimately separates the hunters that kill deer and the hunters who kill mature bucks consistently.
When considering a location to place a stand I take into account all aspects or variables of each property before picking a tree. Here is a list of questions that need to get answered;
1. Do I have pictures or can I confirm from glassing that a mature buck will pass through the area during daylight hours?
2. Is the location better for morning or evening hunts?
3. Does the location allow easy entry and exit without alerting or disturbing deer?
4. What is the main food source in the area?
5. Where are the deer likely bedding?
6. Where are the deer getting water?
7. Do I have any fabricated trails that the deer are using?
8. What wind is best for each location?
The list of questions could get even more in-depth but, I don’t want to bore everyone and I’m sure most of you reading this get my point.
The first thing (above all else) before placing a stand is whether or not a mature buck is hanging around. I know I’ve said this before and I’m pretty sure I will say it again; “Without confirmation of a mature buck in the area, I won’t even bother putting up a stand.” The next thing to consider is when do you plan to hunt? It doesn’t make any sense to hunt a morning spot in the evening or vice versa. Make sure to know what time of day the stand will produce the best opportunity to get a shot. Basically, what I’m trying to say is; “We need to look at the tendencies of the deer we are after and compare them to pieces of a puzzle. The idea is to put as many of the pieces together in order to figure out the best location for placing a treestand.”
Other things to think about:
You never know when a good buck is going to show his face and having an idea of which trees will work best in advance can save you a headache later on. While checking cameras, make sure to look at the trees in the area on the walk in and out. Use this time to analyze and figure out what trees look good and which ones to eliminate.
Another great tool to use when choosing a treestand location is aerial maps. Aerial maps are great for the spots that you glass from the road and don’t risk setting up a camera because you might bump a good buck or change his routine. A perfect “real-life” example for using aerial maps to place a stand was last year when I shot “Tank.” I know with 100% certainty that from the road I would’ve picked a different location and I’m not sure if I would’ve gotten a shot at him had I not looked at aerial maps. So before walking in and putting up a stand, I went on the computer and considered as many variables as I could from above using Google Earth and Bing Live Maps to narrow it down to 1 of 2 trees.
Final Piece of the Puzzle: Rain
If possible, try to set-up your treestand during the rain. I understand it might not be possible to do with your schedule or logistics but, even if you have to take a half day off from work, I honestly believe it’s worth it to place a stand during the rain. Waiting for rain will help with keeping your scent to a minimum and acts as background noise while placing the treestand, cutting branches, and shooting lanes.
With season opener less than a month away and maybe a handful of days to get a treestand in the perfect location. Make sure to take all the collected information up to this point into account before placing your stand. As you can see, I clearly use the “Big 3” (Cameras, Aerial Maps, and Glassing) before placing a stand.
I want to stress that the “Tip of the Week” is to help hunters that are looking for advice or insight on what it takes to harvest a mature buck. Each “tip” has a place for the deer woods and when used in conjunction with one another have consistently put me in a position to see and get a shot at mature bucks. Hunting mature bucks is something I have a passion for and if I can share some of my experiences (good and bad) and insights to help others on IDO get in a position to shoot a mature buck, that’s all I could ever ask for. I want to make it very clear, I do not claim to be an expert when it comes to deer hunting and have a lot to learn.
If anyone wants to elaborate or add something to a tip, please feel free. It would be nice to get some feedback or ideas from others for each tip.
Thanks
Tip 27: Shoot your bow. Practice, Practice, Practice
Try to picture sitting in a tree stand and having a deer walk by that is going to pass through one of your shooting lanes. Now, picture pulling back on your bow before taking the shot. Is it one fluid motion with little movement? Or does the deer bust you because you made to much movement while struggling to get your bow at full draw? Whether a person is new to the sport of archery or an experienced veteran, having a bow that fits properly and tuned correctly will eliminate unwanted movement and is essential for consistent arrow grouping
Draw Length:
After looking up different definitions and equations for figuring out draw length online and calling the local archery shop, below is the simplified definition:
Definition: The distance (in inches) from the front of the riser (on the bow) to where the arrow nock meets the string at full draw.
To be honest, figuring out your draw length based on charts and sizing can get complicated. I highly recommend a trip into your local archery shop to have an employee help with figuring out your draw length while testing a few bows on display.
Draw Weight:
Definition: Draw weight is the amount of force (in pounds) that it takes to pull back your bow to full draw/let-off.
Draw weight is very important and a person shouldn’t try to pull back more weight than necessary or capable of. Anyone who has been shooting at the archery range has seen the guy who has to point the bow up in the air and give it everything he has to pull the bow back to the let-off point. What this person is doing while they struggle to get to full draw is the exact opposite of what actually needs to be done. Draw weight should be based on pointing the bow straight out at your target and pulling back without having to make any extra movements.
After establishing proper draw length and weight, we need to “tune” (*See Tip: 19) the bow so the arrows are releasing off of the string evenly. As mentioned by Archery Country employee and IDO member Hunter_Dan:
“A person could have perfect form when shooting their bow; however, if the bow isn’t tuned properly, arrows will drift all over the place. Having a loose grip, lowering the shoulder, and using a release that lines up with the 1st knuckle on the index finger will prevent trigger slap and will help with consistent trigger pull. Having (3) anchor points; release in hand, hand to face, and string on nose will help for sighting. Make sure to align the peep with the sight housing and stay away from centering yardage pins within the peep sight. Doing all of the above and teaming it up with proper draw length and weight will ensure proper alignment and form when releasing an arrow.”
Great advice coming from someone who eats, sleeps, works, and breaths bow hunting. Thanks Dan!
I personally like to take practice shooting one step farther and will wear the same or similar hunting gear as I would out in the field hunting. It’s not uncommon for me to get some strange looks at the range from others because I’m wearing bulky clothes, have gloves on, and even have my binocs strapped on. Yeah, it can get hot and uncomfortable at times but doing this extra step during practice helps me to prepare for real hunting situations. It’s more for the mental aspect of the hunt than anything.
As you have just read, there is more to shooting a bow than just heading to the range and flinging arrows at a target. In order to be accurate and consistently hit your target at any distance, the bow must fit properly. A properly fit bow will feel comfortable in hand and have a natural feeling when pulling back. If you struggle at all, it’s likely the draw weight is too heavy or the bow is out of “tune.”
Remember, shooting a bow is a form of art and takes practice to perfect. It’s easy to get frustrated when arrows aren’t hitting there mark. Try not to get ahead of yourself when just starting out or shooting for the first time in a while, ease into it and take your time. Having a set routine before and during practice will definitely increase confidence while in stand hunting.
So, whether you are a newbie or experienced veteran, following a few simple steps can help you become a better shot.
Tip 28: Running out of time
It’s time to swing for the fences.
The clock is winding down and opening weekend of archery season will be here before we know it. By putting in a little extra scouting effort during the next 2 weeks, the odds of seeing and shooting a mature buck will drastically increase.
Across the country bucks are hanging out in bachelor groups and will be feeding on the same fields during the last hour of daylight from now until opener. For the most part, bucks are still sporting velvet racks and are on a very predictable late summer feeding pattern. Through my experience, bucks will start shedding their velvet around September 1st and will continue the same feeding patterns into the 1st week of season before leaving their summer haunts. If you are struggling to locate a mature buck, don’t panic, there’s still time to make a couple of last minute moves in order to be in the right position by opening day. In my opinion, the final 2 weeks leading up to opening weekend is the best time all year to pattern a mature buck and pick last minute treestand locations for BBD during the 1st week season.
Knowing a buck’s pattern right before season is the perfect time for a bow hunter to take advantage and use an “element of surprise” type approach to get a shot. In fact, six times in the last 8 archery seasons, I have put myself into position to harvest a mature buck opening week. The years include; 2005, 2008, 2009, 2010, 2011, & 2012. Having killed 3 P&Y bucks in MN during the first week in 05’, 11’, and 12’, and coming real close in 2008 & 2009; I can honestly say this “first week” success is directly related to dedicating time for scouting with multiple game cameras and glassing during the first 2 weeks of September to locate and pattern a mature buck.
I know I’ve said this before and I’m going to say it again; “Glass as much as possible, even more than before, especially during the final 2 weeks leading into season.” If you don’t have cameras in place, that’s okay. It’s not worth bumping a buck out of the area just to get a picture of him, worry about that later. However, if you can get away with placing a few cameras, go for it. Glassing and setting-up cameras may sound like a broken record from previous tips but I want everyone to understand how important getting a visual or picture of a buck during the day is.
Another thing to think about is making sure to have an extra treestand or 2 that is ready to go for a last minute set-up. Make sure to leave them outside under your deck or in the woods close by. You might not get a chance to place the stand before season and have to wait until opening day. Keeping them outside will help keep scent to a minimum. However it works out, try to be as quiet as possible when setting your treestand. The last thing we want to do is alarm the buck of our presence.
Remember, this early season tactic will only work if you have a confirmed sighting of a mature buck during legal shooting hours. Having an awesome buck on camera between 10:00 p.m. – 2:00 a.m. won’t do you any good, odds are; you are chasing a ghost and won’t get an opportunity to harvest him until late October or early November. (That’s if he sticks around)
The final piece of the puzzle for early season success is to sit in the same stand 3-5 nights in a row during the first week and even hunt when wind conditions are not ideal. The only time I wouldn’t recommend sitting for 3-5 nights in a row is when the wind is blowing directly into the buck’s bedding area. If it’s a “transition zone” all bets are off and I will even sit if the wind is blowing directly into my shooting lane. (Obviously, I have done everything I can to eliminate scent when taking this approach)
So, how bad do you want it?
It’s the bottom of the 9th, with two outs, and you’re up. What’s your approach? Do you want to settle for a walk, hope to make contact, or swing for the fences? It’s not in my DNA to settle on a spot that has produced in the past. And I’m sure as heck not going to just go out and hope a good buck walks by. I’m swinging for the fences and only want 1 of 2 outcomes. Either I get a shot at the buck I’m after or I don’t.
Tip 29: Scent Elimination
Having a scent elimination process for hunting takes a lot of extra time and energy. It’s not for everyone and some hunters may even think it’s a waste of time. However, for those of us who do designate time and effort to eliminate scent the rewards can be worth every minute.
Using scent elimination products like laundry detergent to wash your hunting clothes, body wash in the shower, and scent free deodorant is a must to consistently fool the nose of a whitetail deer and get a shot at a mature buck. With only 1 week or so before hunting season begins, now is the time to get your deer hunting clothes out of storage and start your scent elimination process. It’s also good idea to start using scent eliminating body wash and shampoo from now until the end of season.
Throughout the years, the processes I use to eliminate scent have evolved but the desired outcome has always stayed the same; “Eliminate any/all scent possible before heading out for a hunt.”
Washing:
My laundry process includes 10-12 loads of laundry in order to achieve desired results. It starts with towels and works its way through under garments, socks, boxers, everyday clothes, base layers, hats, gloves, backpacks, lightweight gear, and finishes with my outer hunting layers. I have found through experience that it’s easier to wash smaller loads, compared to larger loads, during the process and make sure every load goes through (2) rinse cycles before drying. Anytime I handle clothes from the washer to the dryer or bring outside to hang, I will wash my hands in scent killing soap. I top the laundry process off by spraying the inside of the dryer with scent elimination spray for the first few loads to help minimize unwanted scent when drying.
Storing:
Once the clothes are done drying, the process transfers over to proper storage. For clothes that I wear every day, I set aside an area in the basement to prevent them from getting contaminated. This is simply done by laying a few scent free towels down on some storage shelving. After the towels are in place, I will fold and store all scent free towels and clothing in this area before heading out to hunt. As for my hunting clothes, I prefer to let them air dry on the clothes line outside. I always make sure to turn them inside out before hanging to keep the sun’s rays from fading them. Once the hunting clothes are dry, I will spray them down with Scent Killer Spray while on the line and let dry again. After, they have been on the line for a day or 2; I will store in several Rubbermaid containers and only open and use if I am actually hunting.
Hunting:
Before heading out to the woods, I always shower using scent eliminating body wash and shampoo. After showering, I will put on a pair of warm-ups or pants and shirt that has been washed in scent eliminating detergent. Next, I will load all of my hunting gear into the back of the truck and wait to put any hunting clothes or gear on until I park the truck. Once out of the truck, I strip down to my boxers and start by putting on socks and base layers. If it’s warm out, I will put my rubber boots on and roll up my outer layers and tuck into or tie to my back pack. More often than not, my hunting clothes get put on after I have climbed up into the stand. I do this to keep my body heat down and prevent sweating on my way to the stand. Once in stand, I will put my outer layers on and spray down one last time with Scent Killer.
*Heat causes sweat; sweat causes bacteria and bacteria causes’ body odor
After:
Since each hunt is different, we will have to wait to determine if something is contaminated by the events that have taken place during the hunt. Socks for example are only used one time for hunting. Base Layers might get 2-3 uses before washing again (depends if I sweated or not). And since outer layers have only been touched while wearing gloves and worn “in stand”, they typically only get washed a few times each season. Plus, it’s easy to hang outer layers on the clothes line at home and spray down between uses. If I shoot a deer, it rains on me while hunting, or I contaminated the outer layers in any way, the initial laundry process will be repeated.
As you can see, there are unlimited applications to eliminate scent; in fact, it’s difficult to choose or know which product works best for each situation. I can’t say with 100% certainty that one process is better or more important than another when it comes to minimizing scent. I’m only sharing before, during, and after “scent free” techniques that work for me in order to feel confident in stand.
So, if you have ever had a deer bust you while in stand (which, I don’t know anyone who can claim they haven’t) and you want to increase the odds of a deer walking by without detecting or smelling your presence, I highly recommend having some type of scent elimination regimen during all phases of the hunt. Other than having a perfect wind, eliminating scent is the best line of defense for hunters to fool a deer’s nose and stay undetected in stand.
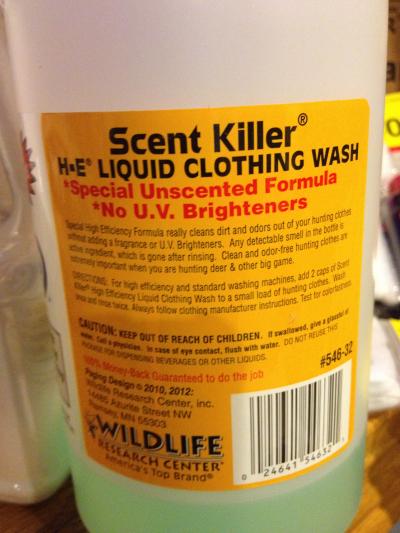
*Pictures are an example of product on the market for eliminating scent. Notice the laundry detergent doesn’t have any UV Brighteners
Tip 30: Calculated Luck
Calculated Luck: Predicting or planning an outcome (before it happens) based on research and previous experience.
I came up with the term “Calculated Luck” two summers ago while fishing for Smallmouth Bass on the Mississippi River. Basically, I found (through experience) that Smallmouth Bass like to hang out in similar looking locations and certain baits or lures consistently produced bigger fish compared to others. Eventually after years of fishing, 2 key factors emerged; one, we narrowed down the locations where we went fishing and two; we used the baits that trigger the bigger fish to bite. It only makes sense, right?
Well, naturally I had to apply “Calculated Luck” to the deer world and the word Smallmouth was simply replaced by Mature Buck. My new term brought a lot of questions. For example: Why would a mature buck pick one property over another? What were the similarities between areas that hold mature bucks? What were the differences? Of course, there are always exceptions to the rule but overall it seems that mature bucks prefer certain properties year after year for a reason. Why is that? Well, there could be several reasons for this:
1. Hunting Pressure
2. Quality Deer Management – Selective Harvest
3. Environment (Terrain, water, food source, etc.)
4. Sanctuaries
After considering a ton of different variables on why a mature buck would pick one property over another, something dawned on me. “Hunting comes down to what we can and cannot control on the properties that we hunt.” Since, I personally do not own any property, there is really no way that I can truly manage for mature bucks from one year to the next. Even though I’m able to confirm a couple 3.5 or 4.5 year olds made it through deer season, each spring brings new challenges for finding a mature buck. Often times, the bucks that do make it, were just passing through and I don’t see any of them the following year. Meaning: If I do get a mature buck to stick around or come back the next year, it’s a bonus.
So, here’s the reality. Out of the 6 local properties I have permission to hunt; only 1 is greater than 80 acres and it’s basically a public spot because the land owner will allow anyone to hunt on it who asks. Since all of the other spots are smaller than 80 acres, I have noticed one thing that the “better” properties have over the others when it comes to mature bucks. I like to call them “pockets of deer.”
*Deer live in family groups and there are “pockets of deer” in certain areas year after year (similar to eddies on the river where fish might school up out of the current)
These “pockets” typically have similar attributes and include at least 2 out of 3 necessities; established bedding areas, water, and food sources. Add limited hunting pressure, managed hunting techniques, and a designated sanctuary to the equation and you have the recipe for a mature buck hideout.
Sanctuaries:
Could be any of the following; golf courses, county parks, Scientific Natural Areas (SNA’s), properties that don’t allow hunting, huge swamps/wetlands, or military reservations.
The next obstacle after locating a potential “pocket” to hunt is getting permission. Getting permission is really the “make it or break it” part of the equation. I will start by doing research online to figure out who owns the property. Sometimes the property owner lives close by or even on the property (which is what I prefer). I might even find out through research that I’m friends with a family member or friend of a friend type situation, which can be a big help. Other times, the property might be owned by a Corp LLC group or an absentee owner who lives in a different state (which isn’t bad as long as you can find their phone #). Basically, I will get relentless in my efforts to gain access to properties in an area I believe holds mature bucks. It may take knocking on several doors or several phone calls before it happens but typically I can get permission from one of the property owners in the area.
*Sometimes, the best approach is by getting permission to hunt after gun season and I’m okay with that. Whatever angle it takes!!
Once permission is granted to hunt a property, I start with the BIG 3 (glassing, cameras, & aerial maps) and my process to locate and pattern a mature buck starts over from the beginning. I don’t hunt the property right away. Instead, I research property lines or boundaries and study the terrain by looking for bedding areas, food, and water sources. After getting all the information I can from a computer, I will walk the property and do some leg work to help visualize a plan of attack.
Yes, some of the properties don’t pan out or hold mature deer but if I didn’t go through my efforts to figure that out, I wouldn’t ever know. Plus, we are all guilty of the “Grass is always greener on the other side” or, “If I could only hunt over there” philosophy. Well, I hate to say it but it couldn’t be any further from the truth.
The truth is we can only control so much when it comes to deer hunting and most of us don’t have the property or resources to manage bucks to reach maturity. Since it’s hard to manage deer from year to year on smaller properties, our main objective should be to get permission to hunt several properties and understand why mature bucks consistently pick one property over the other.
After taking a more in-depth look at why a mature buck would be living on a certain property, we need analyze the reasons why, eliminate as much luck out of the equation as possible, focus on a specific spots, and capitalize on limited opportunities. Basically, focus on what we can control to consistently put ourselves in the “right spot at the right time”
The foundation of “Calculated Luck” is a set of principles I use when looking for places to hunt. It starts with identifying properties that have food, water, bedding, and sanctuaries.
The concept of “Calculated Luck” is to find several of these properties to hunt because they tend to hold good numbers of deer that have a chance to mature.
Once we have found the better properties based on research and experience, the odds of seeing, shooting at, or harvesting a mature buck will dramatically increase.
*Remember, it’s not an accident that there are mature bucks on certain properties each year. There are several reasons and we need to understand what those reasons are.
Tip 31: Predicting Deer Movement
Through the years, I have documented all of my mature buck sightings, encounters, and photos. By doing this, I have come to realize that starting around Oct. 16th mature bucks will get up on their feet earlier than normal, making themselves vulnerable during legal shooting hours. This earlier than normal deer movement gives us hunters a chance to pattern a good buck and move in for higher percentage harvest opportunity before the rut. In fact, I have taken it a step further and narrowed it down to a 2 week gap from Oct. 16-31, with the best days being Oct. 21-27. Year after year, the biggest bucks I see while hunting seem to fall within these dates. I’m sure there are several reasons for this early movement; corn getting chopped, cold fronts that bring sub-freezing temperatures and of course the rut only 2-3 weeks away. But, the biggest plus about hunting during this 2 week gap is that the bucks are on a predictable scent checking routine and marking their territory.
A perfect example of this early movement and encounter is from my most memorable hunt. It was Oct. 24th, 2000 when I heard a series of deep long grunts (for over 20 mins) that made the hair on the back of my neck stand up. I just knew it had to be a buck named “Cover” and I hadn’t even seen him yet. Cover had been shot at on several occasions during the previous 2 firearm seasons and somehow, he always managed to escape unscathed. His nickname was that of legend and was based on conversations with the neighbor. According to all that had seen Cover, he was the size of a Hereford cow and carried the biggest rack any of them had ever seen. Each person that missed him said the same thing; “If you kill this buck, you will be on the cover of North American Whitetail.” I personally hunted with 3 guys who had shots at Cover and missed. I also happened to be in stand when the neighbor across the road shot at him 6 times on gun opener with a single shot .410 that seemed more like pump action because of how fast he popped his shots off. I’m telling you, this buck made men lose all control and the term Buck Fever is legitimate when it comes to animals of this stature.
To get back to my encounter, I watched as 2 does walked out into an opening between me and the Cattail edge of a swamp. The shot to the trail they were walking on was about 40 yards and only being a couple years into bow hunting, it wasn’t a shot I was comfortable with. I was still using the copper metal pins and didn’t have the “latest and greatest” bright fiber optic pins yet. To make a long story even longer  , I ended up freezing up on “Cover” as he walked by with 2 other bucks on the same trail about 5 mins after the does passed through. He was every bit of the buck that the other hunters made him out to be and I would guess him to go 275+ field dressed. He carried the biggest, most beautiful rack that I have ever seen. Cover had it all; mass, height, and width. To this day, he is still the biggest bodied and racked buck I have ever seen while hunting and I’m not sure if anyone ever shot him. If they did, it was after his prime and he wasn’t the buck he once was.
So, naturally on Oct. 27th, 2000 I was back in the same stand and wish I could tell you that I saw Cover again but I didn’t. I did however; see 5 different bucks that evening. One was a very nice 3.5 year old main frame 8 pt with a couple of kickers. He ended up stopping 12 yards from my stand and I missed low.  I couldn’t believe it. Oh well, that’s hunting.
So, after having a couple of encounters with mature bucks during this stretch, I pressed the issue and sat in that stand as much as possible before gun season but didn’t have any other mature buck sightings like the 1st two hunts. The encounters made me rethink my approach and evaluate what was different about those hunts.
Since 2000, the same findings have held true. “I always see the biggest deer of the year during the last 2 weeks of October.” With my personal best buck (174”) being shot on Oct. 21, 2007 and seeing a whopper (170”+) on Oct. 26th, 2006. I am a believer in pre-rut patterning.
I’ve come to following conclusion:
It is very difficult to predict deer movement before it happens, especially for mature bucks. A few ways to combat against the transition of deer movement from early season, to mid-season, to the rut, and late season is by taking a proactive approach. I just use a couple of simple techniques to start out with during the 1st week of October.
1. I scrape the ground under traditional licking branches without using any type of scent and set-up cameras to monitor the scrapes that I have just made.
2. I do not hunt very much during the next couple of weeks and rely “heavily” on glassing and cameras to locate a deer I’m after.
3. Wait for a low pressure cold front.
Most of the time, the deer are moving but not out in the open and I find that they will mess up at some point between Oct. 16-31. Plus, it’s better to stay off of their radar and keep them around. If you feel that you need to get closer to a bedding area to increase your odds, go for it. But, that decision should be based on the pros and cons of bumping the deer you are after off your hunting property.
Pretty soon there is going to be fresh rubs and scrapes showing up all over the woods and we need to have a plan in place to decipher which buck or bucks are making that sign. The sooner we are able to identify these areas, the easier it will be to cross paths with the buck we are after. Sometimes, it takes a little more effort and leg work before the hunt to harvest a deer but, it’s worth it when everything comes together. So, take advantage of this 2 week window when bucks are on a predictable scrape making and scent checking pattern. It’s the best time (IMO) to get out and shoot a MONSTER!
Tip 32: Scrape Hunting 101
Purpose: Getting a mature buck within range during shooting hours and away from the late night scent checking excursions.
Each of us faces different variables, situations, and circumstances when it comes to deer hunting. Here in Central Minnesota for example, it’s not very common to watch a mature buck work over a scrape. In fact, I can count the times on one hand when a mature buck was scent checking a scrape within bow range. My guess is the mature bucks in your area have similar tendencies compared to the mature bucks in my area and do the majority of “tending” scrapes sometime between 10:00 p.m. and 2:00 a.m.
Universally, almost all of us face the same challenges when it comes to hunting over scrapes. From the outside looking in, hunting over scrapes in hopes of shooting a mature buck appears to be a “no brainer.” After all, the bucks are giving us a chance to see where they’ve been and likely where they will visit again in the near future. Even though scrape hunting appears to be easy, don’t let the fresh sign fool you. Scrape hunting can be one of the most challenging deer hunting strategies we face in the deer woods and more often than not, will lead to irrational decisions and baffle even the most educated hunters.
Over the years I have messed around with all types of cover scents, deer attractants, and countless “mock scrape” set-ups in an effort to lure a mature buck to scent check a scrape while I happen to be hunting. As most can tell by reading “Tip of the Week”, my personality will buy into almost anything that has to do with hunting whitetails. With that said; the mock scrape technique that I use has proven affective and definitely played a part in helping me harvest 2 mature bucks in the past 6-7 years. (If you’re into baseball, that means I’m batting .285-333% and I will take those averages all day long.)
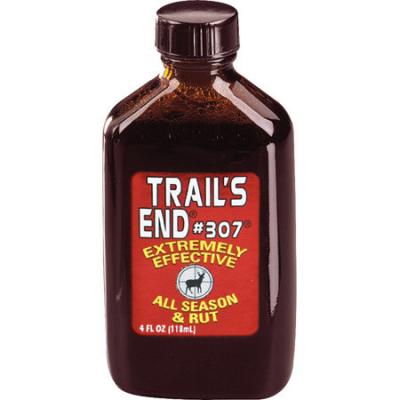
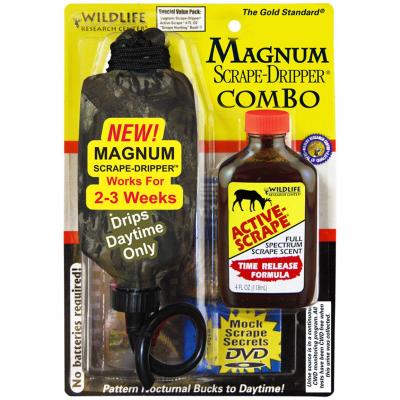
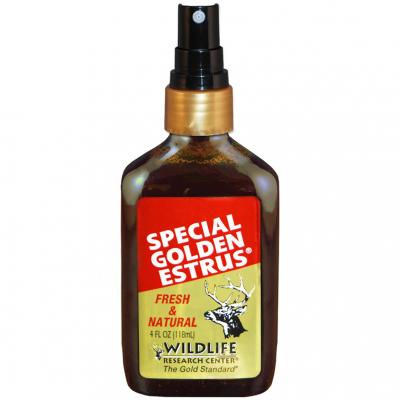
It simply involves products from Wildlife Research Center:
Trail’s End 307 (4oz)
Active Scrape (4oz)
Golden Estrus (4oz)
Magnum Scrape Dripper
The first step is to determine which licking branches to hunt by (Refer back to Tip: 23). The 2nd step is to take a broken branch from the forest floor and scrape up the area on the ground below the licking branch. The 3rd step is to mix 1oz of the Trails End 307 with 1oz of the Active Scrape in the Magnum Scrape Dripper and tie onto the branch above the licking branch. After the dripper is in place, I spray a 10’ in diameter area of Golden Estrus all over the ground, weeds, and small plants. I finish by placing cameras by each mock scrape to monitor deer activity.
*Remember to shake the scent or lure product in the bottle vigorously before applying
I like to do this same set-up on 4 different properties and 3-4 days in advance of when I plan to hunt (usually around Oct. 17-18). By setting up “mock scrapes” in advance, it gives bucks in the area a chance to locate this new scrape and hopefully return. It also gives the cameras a chance to capture the most recent deer activity and gives me an idea of which scrape(s) would offer the best opportunity for a shot at a mature buck. Who knows, I might make a last minute decision (based on pictures) with a new treestand set-up and try to ambush a good buck in a transition area that I hadn’t set-up in before. In my opinion, there isn’t a better time to make a move.
As you can see, when it comes to scrape hunting, there’s going to be lots of trial and error. What works for one individual might not work for another. I personally have found a technique that’s a mixture of a few different scents working together to give me confidence when hunting over scrapes during the last 10 days of Oct. My intention with this information is to help others with a starting point and become more efficient when it comes to scrape hunting. Ultimately scrape hunting is the same game for all of us; it just involves a different opponent.
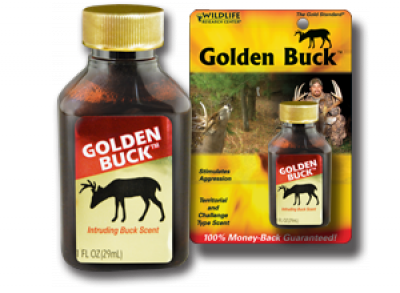
*BTW- For obvious reasons (pic) I’m excited to use Golden Buck
Tip 33: Calling Techniques
Choosing the right calling method or technique for the purpose of getting a deer to come within shooting range can either make or break your hunt. Whether we choose to rattle antlers, use a grunt call, tip a “Can Call” Doe bleat, or snort wheeze as a calling method deer will react differently and there is no way of knowing ahead of time which one is going to give you a positive or negative response.
Rattling:
There really isn’t much involved with this technique other than banging a set of antlers together in an attempt to mimic 2 bucks sparring. Basically there is 2 ways to rattle. Either you will tickle the antlers together to imitate a couple of bucks just screwing around or you will hit the antlers hard for up to a minute or so to imitate an all-out fight. A good time to rattle antlers together is when there visibly isn’t any deer around and you want to try and get the attention of a deer that is in the area. It’s a form of “blind” calling. Basically, making some noise to get the attention of deer and hope they come in to investigate the situation.
*Try and use real antlers that are from a middle sized rack. Something in the 120-130” range seem to work well.
Grunting:
Grunting can be done with or without a grunt tube. Similar to rattling, grunting can be done in various tones and lengths. Grunting usually involves a soft “burr” or long deep “BURRRRRR” and can be repeated as much as 100 times. There really isn’t a right or wrong way to grunt. However, I wouldn’t make a DEEP LOUD BURRRR if the deer was very close. Instead, I would do some softer, less confrontational grunts to turn a deer from walking away and get him to come my way. I typically make louder grunt calls when I don’t have any deer around me and save it as another “blind” call situation.
Doe Bleat (Can Call):
Doe bleats can either be your best friend or your worst enemy. I personally have better success calling in does with a Can Call than I do bringing in the bucks. A good time to use the doe bleat is when a doe is getting trailed by a buck and the buck is oblivious to the world. He may not be paying attention but the doe likely is and she may come over to investigate who was making the bleat and bring the buck with her. Unlike Rattling or Grunting, the Doe Bleat isn’t very load and only use this when I have a visual on a deer.
Snort Wheeze:
This is one of my favorite ways to “blind call” and get the attention of a mature buck. I use the Snort Wheeze during the entire season but it typically works best during the late pre-rut. It’s a very confrontational noise that the Mature Bucks will make to show dominance. I don’t use a call for this, instead I make the Snort Wheeze by blowing all the air I can through my lips. In order to make the right sound I find it best to take my top teeth and press them against my lower lip (while the lower lip is curled over my bottom teeth). Try and squeeze the air through your teeth to make a load wheezing noise. Also, make 2 short bursts and carry the 3rd push of air as long as you can. This call is similar to the Rattling and should only be used when deer are not around or way out in the distance.
As you can tell, there really isn’t an exact science for which call to use and when. Most of the time, it’s a feeling that you get when you are hunting that will determine which call to use and why. Ideally, you won’t call or attempt to call all the time. A good rule of thumb is to wait at least 30-45 minutes between calling sequences. Remember, calling too much can push deer away and educate them.
Here is a link on the Facebook site for In-depth Outdoors for those who want to share.
You must be logged in to reply to this topic.