After spending considerable time trying to find an air rifle target trap that met my needs, I decided to do a home build.
The problem: I have a 10-yard range in my basement and I was using an older target trap, but my kids want to shoot and both my trap and almost every trap on the market is just too small for them to reliably hit the target with an appropriate margin of error to make sure there are no safety issues.
I also wanted a shelf to place metallic silhouettes, my kids love to shoot these (and so do I) but, again, they require a wide trap and a sacrificial “shelf” that is elevated so low shots will still be picked up in the trap.
Also, my old trap was thin steel and the back was giving out, so time for a replacement. Nothing on the market was big enough and most traps are cheap, sheet metal jobbies that will not stand up to higher-volume shooting.
So into the shop I went.
I designed a trap that is 18 inches wide, 11 inches high, and 10 inches deep. This size will be safe for the boys to shoot at and will accommodate side by side full sheet targets. I built the “case” out of scrap OSB (1/2 inch) because that’s what I had laying around.
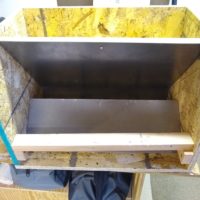
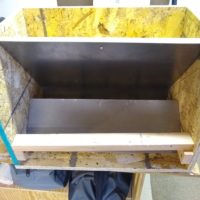
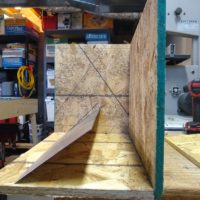
The actual trap where the pellets hit and are stopped is made out of sheets of 16 gauge steel. The lower and upper deflectors are set at a 50 degree angle and the edges are set in a dado in the sides of the case.
Both the lower deflector and the rear trap steel are “backed” by laminating the steel to a piece of OSB using poly glue. The result is a very rigid surface that even a 1000 FPS pellet does not even dent. It is also very quiet as the OSB backing deadens the sound so there isn’t a high-pitched PLINK sound with every shot. For safety, there are 2 layers of OSB at the back of the trap, so even if a pellet would somehow penetrate the steel trap plate, it would have to go through 1 inch of OSB to escape the back of the trap. Not going to happen. 100 rounds of testing haven’t even dented the backing.
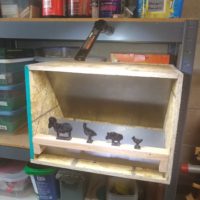
The last step was to add a sacrificial shelf for metallic silhouettes. The shelf is elevated 3 inches from the bottom of the trap, so low hits will not risk hitting below the trap. There is enough room to add a second silhouette shelf above.
Somebody’s going to ask why not build it all out of steel and weld it. Cost and weight. All of the steel in this trap cost $35. Adding steel sides, top, and bottom would have tripled the cost easily. Also, welding the deflection plates at an angle would have been very challenging with my beginner welding skills. Using wood produced a faster, cheaper, and lighter build.
This should produce a lot of fun for the boys and much-needed practice for me.
Pictures:
1. Front view showing the upper and lower deflector (trap) plates. You can see the OSB backing on the upper plate. Both plates have this backing laminated to them for added strength and safety.
2. Side view showing the dado cuts that recieve the edge of the steel plates. Lower defector installed to show how it fits. Backing OSB was not yet laminated to plate at this point.
3. Finished trap with silhouette metallics in place on the shelf. The trap is wide enough to accommodate 2 paper target sheets (standerd 8.5×11) side by side.
Grouse


