1996 Alumacraft tournament pro 170 tiller rebuild

  • broth82
    Posts: 185
    #1721891

    I picked this boat up at the end of fall last year, at that time it had a small soft spot right where the floor meets the front deck, not a big deal. It would occasionally get a little water in it and after filling a couple of screw holes it would sporadically get water in the boat, now I’m only talking maybe a pop bottle full or so. Then over labor day weekend I was fishing with my son for maybe half an hour to 45 mins, when he gets his lure snagged in a tree on the bank. I went to the back of the boat to help him and just as I get to the back of the boat water starts coming over the floor. I quickly broke his line and started the motor, it took for ever to get on plane with the bilge pump running non stop.

    My first thought was my plug fell out while we were running across the lake, well we made it to the access and I jumped out to check the plug (I always carry 2 extras) and the plug was still in there. So I loaded the boat on the trailer and pulled the plug, there had to be 25-30 gallons or water in the boat. Once on the trailer I crawled under it thinking I hit something and there was a hole in the boat, but I couldn’t find anything. After we got home I put the plug in and filled the boat with water till it was just at the floor, so I could find where the leak was coming from. after letting it sit for an hour, on the gravel driveway I went to look for water.

    There wasn’t any water leaking, thinking what the heck there has to be a leak, I moved to the next logical spot. The livewell and bait tank, so I plugged the drain lines and filled them with water starting with the bait well. No leaks there so I went to the livewell and started filling it, after a couple of seconds the water started pouring out of the drain plug. I found my problem the drain hose for my livewell had become disconnected while we were going across the lake, the bad part was I couldn’t find the hose. After some digging I ended up finding it but there was no way I could reattach it, it was roughly an inch too short.

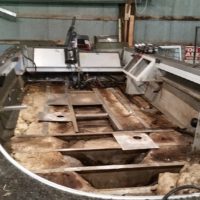
    After digging around for the drain hose I could tell it had been leaking for quite sometime as the floor was starting to rot around it. Finding this is what prompted me to start the rebuild, I created a list of what I wanted to do and started removing floor pieces.

    Here’s the list of what I want to accomplish with the rebuild; All new flooring through out the boat, new carpet, remove the bait well to add more storage, replace all the wiring, replace all the livewell hoses, replace electrical switches and revamp the rod storage to better accommodate 8 rods.

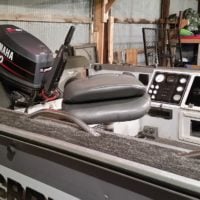
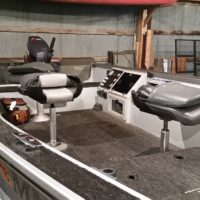
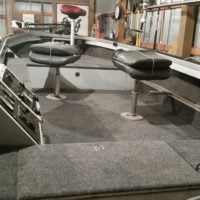
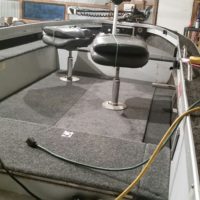
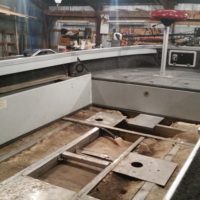
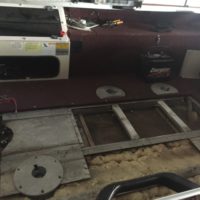
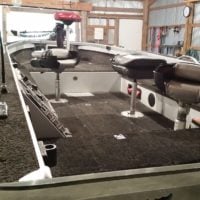
    I’ll update the post as I go but here’s what the boat looked like before I started
    Attachments:
    1. 8-1.jpg

    2. 6-1.jpg

    3. 5-1.jpg

    broth82
    Posts: 185
    #1721898

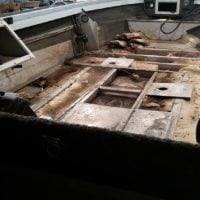
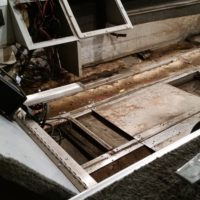
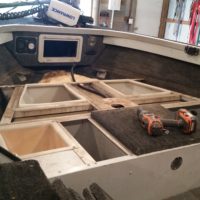
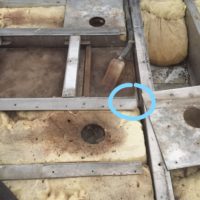
    After trying to remove the flooring and failing terribly, I found out that when Alumacraft built the boat they put all the flooring in then installed the compartments and front deck. After realizing this I started to remove all the compartments, after about 10 hours of and hour here and an hour there this is where I stopped the teardown and started cleaning. All the carpet, foam and bottom of the boat got a good pressure washing.

    Attachments:
    1. 34.jpg

    2. 32.jpg

    3. 29.jpg

    4. 24.jpg

    Aaron Kalberer
    Posts: 373
    #1721907

    Lot of work but very rewarding! I rebuilt a 1983 starcraft fish and ski to a strict fishing boat adding livewell, rod locker and front deck. I get compliments on it often mainly because of the new silver paint and the cresstliner superhawk decal going down the whole boat.

    Good luck on the restoration, looking forward to seeing your progress!

    Attachments:
    1. boat.jpg

    broth82
    Posts: 185
    #1722004

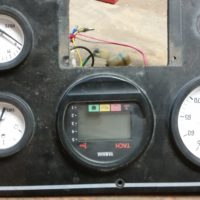
    After I took the main floor out, I found out that it was only 1/2″ marine grade plywood. I really wanted 5/8″ -3/4″ for the floor to help add strength where there were no supports, but in order to do that I would have had to drill out all of the rivets going through the side of the boat that held the compartments in place. I ended up cutting the flooring where the compartments ended and left the flooring under them 1/2″ and made the main floor 3/4″. After getting most of my supplies for the wiring and plumping I started that process. I never used the bait well so that came out and now will free up an additional area for storage, I replaced the old hoses for the livewell and routed them a little bit differently so they would be easier to change if needed in the future. I also ran 1-1/4″ electrical PVC conduit along both side of the boat to run my electrical in (this will make adding a new circuit or replacing wiring much easier) I ran all of my wires for my front bow light, bow depth finder and trim tilt switch through one conduit and then pulled new wires for my trolling motor through the other. I did this mainly because my trolling motor batteries are on the opposite side of my boat as my starting/accessories battery. All of my crimps are soldered heat shrunk connections to prevent corrosion. I also ordered a new switch panel and accessories battery switch off Ebay to replace the old Alumacraft switches. I purchased a sheet of 3/16″ marine grade HDPE for the gauge cluster plate, I also was able to finish carpeting the front deck and have it set in place.

    Attachments:
    1. 36.jpg

    2. 47.jpg

    3. 51.jpg

    broth82
    Posts: 185
    #1722012

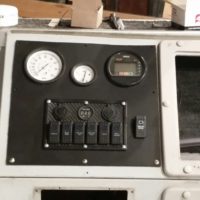
    The Accessories battery switch will kill power to the switch panel, that way my kids can’t bump the switches as easily, and have the bilge pump running all day…. I decided to go with a 6 gang switch panel and will have a switch for the Aerator, Bilge, Running lights, Interior lights, Recirculating pump and Depth finders. The switch panel I bought came with a Digital voltage gauge, 2 USB chargers and a round socket, they are illuminated as well.

    Hot Runr Guy
    West Chicago, IL
    Posts: 1933
    #1722014

    Nice work. Have you added a float switch for the bilge pump, wired directly to the battery, so that if the hull sits in the water overnight during a storm, it pumps itself out?

    HRG

    patk
    Nisswa, MN
    Posts: 1997
    #1722034

    really nice work, very impressive waytogo

    Some nice touches and well thought out. You’ll love the ability to easily route another wire through. When I did my remodel I pre-emptively ran some extra electrical. Ended up using it for an LED lighting project the following year.

    broth82
    Posts: 185
    #1722491

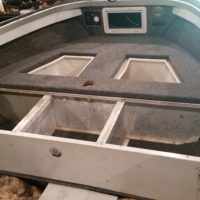
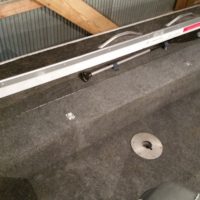
    I was able to get a lot of the flooring done and am now working on the rod locker, at first I was going to use 3/4″ plywood but it ended up bending in the middle by 1/2″. So I scrapped that idea and am now going to make them out of 6061 3/16″ aluminum so I don’t have to worry about it again. I have the rod locker tube holders cut and am going to get them glued and installed. Then that’ll be about it for the rebuild.

    Hot Runr Guy – That’s a great idea thanks, right now I’m thinking of going with either a float switch or an automatic bilge and keep the one I have has a spare.

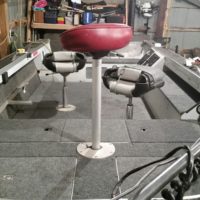
    Here’s a couple pictures of the finished floor

    Attachments:
    1. 67.jpg

    2. 65.jpg

    broth82
    Posts: 185
    #1722494

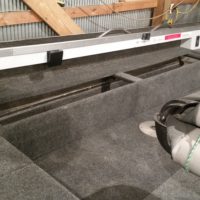
    More pictures

    Attachments:
    1. 69.jpg

    2. 68.jpg

    crappie55369
    Mound, MN
    Posts: 5757
    #1722920

    Wow you’ve been hard at work! thanks for posting the boat looks great!

    Aaron Kalberer
    Posts: 373
    #1723026

    Great work! Looks awesome and added some upgrades to boot!

    pool2fool
    Inactive
    St. Paul, MN
    Posts: 1709
    #1723027

    Really impressed with the work, @broth82 — enjoy that boat!

    broth82
    Posts: 185
    #1723059

    Thanks for the compliments guys, It is hard work but enjoyable for me. I like the challenge of trying to figure out things on the fly, since most of the boat supports and what not are not square. I did find out that you can’t bend 6061 Aluminum, so I ended up going with 5051 1/8″ thick aluminum for the lids. I have to bend them yet and get them installed, hopefully before the weekend.

    I’m pleased with how the boat is turning out so far, one thing I might still do is on the aluminum lids there is a 3/4″ bend on all sides to add strength and so they match the thickness of the plywood. The factory had carpeted around that lip on both sides, I have them all glued that way and now a couple have started to let loose a little on the inside so I may just cut it flush with the bottom of the lip. I’ll take a couple pictures of what I’m talking about, but when I glued them I did clamp a 1×2 on all sides (inside and out) to help put pressure on the carpet and hold it in place.

    broth82
    Posts: 185
    #1728481

    I bent the lids for the rod locker but they were 1/8″ too wide, so I have to work around that. Between hunting and the cold weather we’ve been having I decided to wait until spring to finish the putting the carpet on the rod locker lids. I have the tubes for the rods installed with 8 rods in there and it works great, the only problem I have is 2 of my rods have guides that are 1/8″ larger than the ID of the tubes I used so they wont fit in the locker.

    I may end up removing one of the tubes and notching the hole to fit the rod or drill a 2″ hole in the middle dividers at the very bottom and have the rods lay in that way. I’ll try to get a couple more pictures up of where I’m at right now and what I might modify with the rod locker.

    Leslie Martin
    Posts: 18
    #1752533

    I am currently redoing the floor in my 98 alumacraft magnum. I am at the point of removing the live well, to get the rest of the left portion of the floor. My question is, if I just cut around the live well and console, and replaced the portion in the main area to where the seats are located will the floor under the live well sag or did you put some kind of support under the joint since you said you had to keep the original 1/2 inch under the compartments. Any input would be appreciated since you are literally working on the same beast I am. Thanks

    broth82
    Posts: 185
    #1752664

    I took the entire floor out of mine since it was rotted a little around the livewell drain. Since I put in 3/4″ plywood I wasn’t worried about it sagging, if I used 1/2″ I would have put in a support for sure. The main area that I added supports to was right at the back side of the front casting deck. Since the 3/4″ plywood ended right at the edge, there wasn’t much for support (this is where I had a soft spot in the original 1/2″ floor). I did add a thin piece of aluminum to that area and it really helps.

    Let me know if you have any other questions, I’d be happy to help. Post some pictures of your boat also.

    I did finish the rod locker lids and that addition to the boat is awesome.

    timjamison11
    Posts: 28
    #1752760

    Very cool! Love these type of projects.

    Leslie Martin
    Posts: 18
    #1752965

    What I mean is, leaving the old floor under the live well and console, and just replacing the exposed portion where you walk, cutting around the left edge of the floor. I might try and slide some thin aluminum thru to the outer support lip under the older plywood that i cant get to, and attempt to prevent and sag along the edge. I am aiming to keep the gas tank accessible like it was from factory. I will post pics later.

    broth82
    Posts: 185
    #1753445

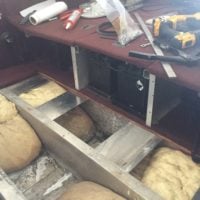
    Are going to be using 3/4″ plywood for the floor or keeping it 1/2″? Here’s a picture of the main floor removed and the 1/2″ flooring under the livewell still in place. The Aluminum supports are only a couple of inches away from the livewell so if you use 3/4″ I wouldn’t add any aluminum to that part. I would however add support to the area just behind the front deck (you can see the piece of aluminum I added there.

    Attachments:
    1. 56.jpg

    Leslie Martin
    Posts: 18
    #1753668

    Ok that last picture was really helpful, and after reviewing all of your pics, i think you left it half inch under the battery and rear storage as well right? Otherwise that front wall of that compartment would be higher then the rear or am I mistaken?. From what I see that rear wall toward the back is pretty rigid, and so I think I might just make that a seperate piece right across the back compartment, and then go 3/4 for the open part. Think the plan is coming together. And I like that you didn’t continue the floor under the front casting deck like factory. So those two pieces in the main floor,,,,, your not overly concerned about accessing the tank much then? Or are they easy to remove with screws I’m assuming? I am seriously not trying to critique, I am just so glad I’m not alone in doing this. Thanks again

    broth82
    Posts: 185
    #1753764

    I left all of the flooring under the compartments 1/2″, it was way easier to do then drilling out all the rivets in the outside of the boat. For the main floor I wanted to go with 2 pieces since, I feel that it looked nicer then 3 pieces. I also got rid of all the aluminum rivets that held the floor in place and use some very large head self tapping screws that are designed to go through treated plywood and into aluminum. That way if I ever need to access the gas tank I can just unscrew the floor and lift it right out. I bought the screws through McMaster Carr since it was the only place I could find the right ones. I ended up using the 1 1/2″ length ones and they worked awesome.
    McMaster Carr part number: 94054A251

    A quick tip that you probably thought of already, but I ended up making a template for the frame work under the floor using wrapping paper ( I traced out all of the braces. That way when I put the new floor in I could lay the paper on top and start putting in screws without having to worry if I hit a brace or not.

    broth82
    Posts: 185
    #1753767

    As for the rod locker I did raise it up so it is level with both the rear battery compartments and the front deck. I never understood why Alumacraft would have it lower in both front and back, to me it looked weird.

    Leslie Martin
    Posts: 18
    #1755046

    Thank you so much for the detail. I am really torn as to how to finish the floor sections. Tank accessibility is my concern but yes, the two piece floor is way better looking. From what i can tell on McMaster Carr, those screws are Zinc coated. I am either going to order the true ones from Alumacraft or go another route thru a local boat builder. I have just picked up the Aluminum Supports for the front, and am about to cut out the front and left side piece. Here goes

    Attachments:
    1. IMG_2995.jpg

    broth82
    Posts: 185
    #1755296

    How big is your boat and motor? Mines a 170 with a 60hp Yamaha.

    Looking at your picture, one thing I would look at is how many seat bases do you use and where are they located? For me I wanted 3 in the floor of the boat since on mine if I added more it would be really crowded. I also moved my drivers seat a little offset from the middle of the boat, I set the seat in place then sat in it and moved the motor side to side and kept moving the seat until it was comfortable then moved my under the floor mounting plate and attached the seat base to the floor.

    Leslie Martin
    Posts: 18
    #1756726

    Hey, I am keeping the three in the front, almost want to make it just the two, the front center and the left one. Ill just install a pedestal for the tiller seat. I have a higher aluminum floor joist by the front right seat location. Its a full 1/4 inch higher then the crosser right beside it. not quite sure if grinding the higher end down is a great idea, but a needless hump wasnt the plan either. Besides that i am getting the supports in at the front. just sliding some .100 aluminum under the forward crosser under the compartments and then riveting to the exposed crosser rib. Ill post pics, the pieces i have put in are better then nothing but not really that durable. I may just put a piece of angle in their to help support thr front, not really loving it. any input on the pic i post would be appreciate it.

    Leslie Martin
    Posts: 18
    #1756737

    This is my high spot. I think im gonna leave the seat location out and just cut that end down. Keep it simple

    Attachments:
    1. IMG_3054_LI-2.jpg

    Leslie Martin
    Posts: 18
    #1756739

    These are my supports up front. But i may upgrade to angle off the lower support

    Attachments:
    1. IMG_3051.jpg

    Leslie Martin
    Posts: 18
    #1756742

    It in a Magnum 165 powered by a 60 hp 2 stroke Yamaha.

    broth82
    Posts: 185
    #1757067

    I agree with you that I would level the floor as much as you can, a 1/4″ high spot would be noticeable. I Like the support idea that you have in the second picture and it should really help stiffen up that part of the floor. Looking good keep the pictures coming as you go.

    I don’t know if your boat is like mine but, when I first bought it the previous owner have the trolling motor batters where you have them and to me it felt like the boat was really bow heavy. I moved them to the rear compartment and that helped a lot, I ran new wires front the bow all the way to the back compartment and tied in the stern trolling motor plug as well. I used 8 gauge wire from Running’s where you can buy it by the foot.

    broth82
    Posts: 185
    #1757069

    Well you motivated me to finish up my boat project, I has a couple little things I needed to finish up. I installed a float switch for the bilge pump, powered the back lights form my speedo, fuel and tach. gauges and added the gas shocks for the rod locker.

    Here’s a couple picture of the new rod locker, I’m really happy how it turned out and can now fit 8+ rods in it and can get at each one without having to remove all of the others first.

    Attachments:
    1. 77.jpg

Viewing 30 posts - 1 through 30 (of 52 total)

You must be logged in to reply to this topic.